
You're probably here because you need a decal that looks clean, sticks straight, and doesn't turn into a Saturday-long regret. Maybe it's a logo for a laptop, a name label for school gear, or a graphic for a car window, and the core question isn't “Can I make it?” but “Which method will work on the surface I've got?” The difference matters, because custom decals can mean a fast hand-cut label, a full-color printed sticker, a waterslide transfer, or an iron-on graphic, and each one behaves differently once it leaves the screen and hits real material.
Table of Contents
- What Kind of Custom Decal Are You Actually Trying to Make
- Tools and Materials You Will Need for Each Method
- Preparing Artwork Files That Cut and Print Cleanly
- Step-By-Step Production for Each Method
- Cost, Time, and Durability Compared Across Methods
- Application, Surface Prep, and Fixing Common Problems
- When to Stop DIY and Outsource to a Professional Supplier
What Kind of Custom Decal Are You Actually Trying to Make
A small business owner asking for ten laptop stickers, a maker placing a logo on a resin table, and a parent labeling school supplies are not shopping for the same thing, even if they all call it a decal. The substrate changes the method, the finish changes the feel, and the expected lifespan changes what's worth the effort. That's why the first decision is not about design style, it's about where the decal has to live and how often it'll be touched.
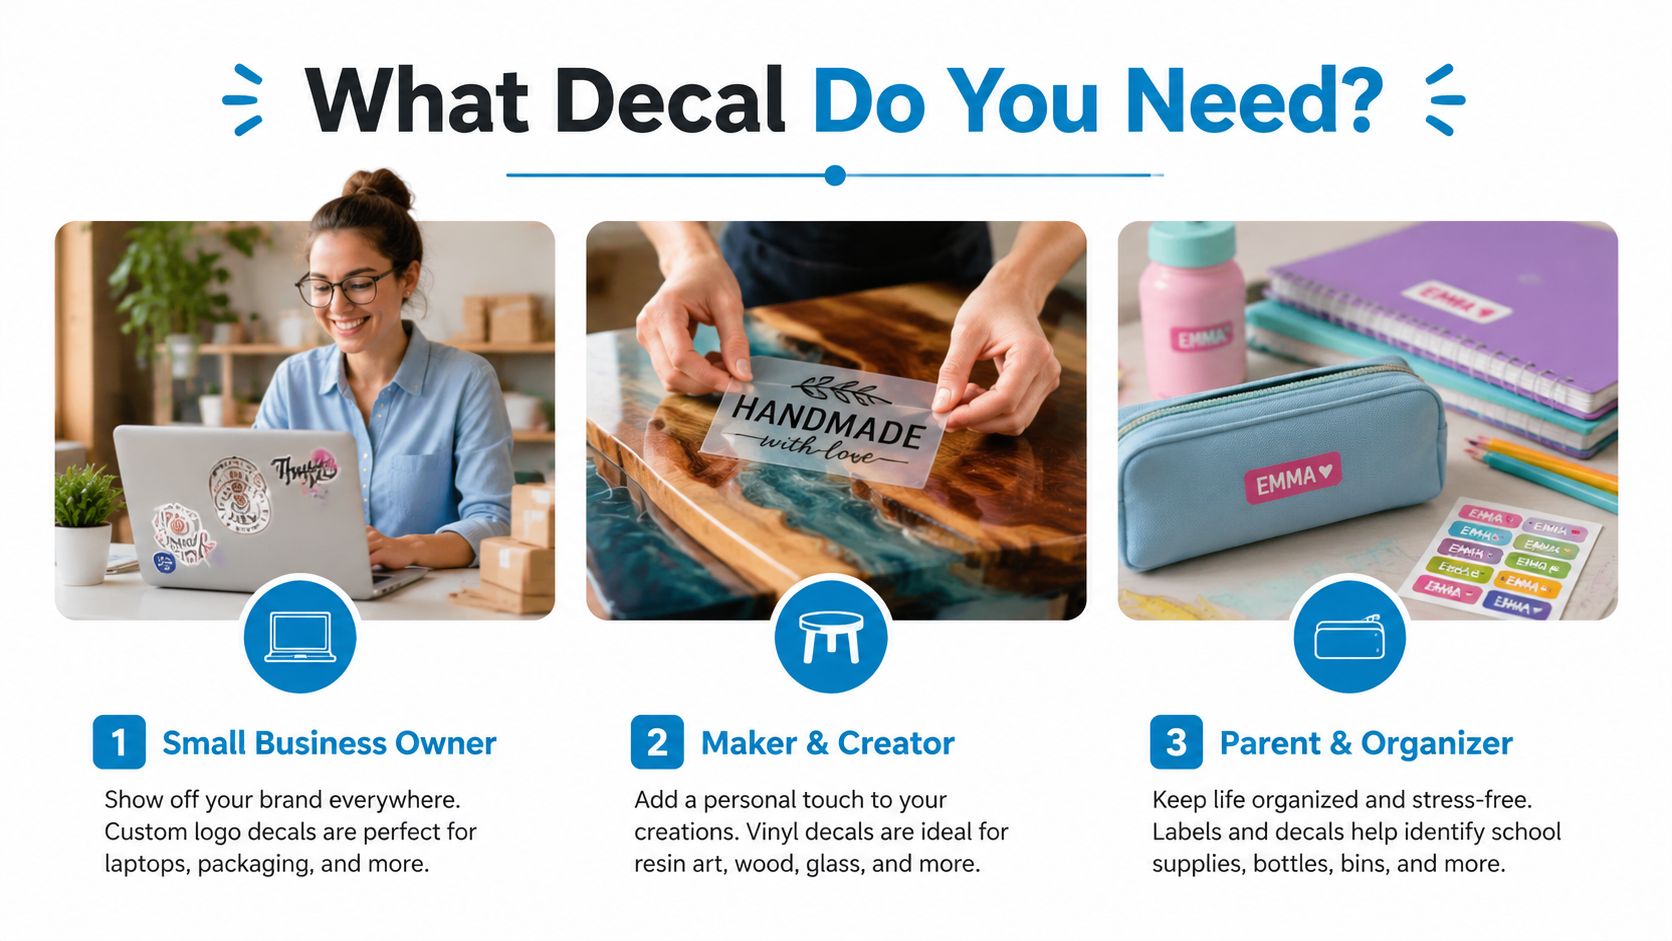
Four routes, four different outcomes
Hand-cut vinyl fits one-off logos, simple lettering, and quick jobs where you're willing to trade speed for control. It's the right pick when you want durable outdoor-style graphics without buying a cutter, and a hand-cut custom vinyl decal can be made in about fifteen minutes with a small toolset, according to the hand-cut workflow in the brief. For a garage project, that's often enough.
Vinyl cutter with adhesive vinyl is the cleaner path when you're repeating the same design or need sharper text. It's better for signs, stickers, and fleet labels because the machine handles repeatability, while vinyl's long history in outdoor graphics and vehicle applications is tied to the visibility that made decal advertising a practical low-cost branding format, with 30,000 to 70,000 daily vehicular impressions noted in the provided source.
Waterslide decals belong on smooth, often curved objects like models, ceramics, and finished hobby pieces. They're more delicate, but they can carry fine detail where vinyl feels too thick or stiff.
Heat-transfer decals, usually called HTV or iron-on graphics, are for fabric. If the target is a shirt, tote, or other garment, a sticker-style decal won't do the job. For a quick comparison of decal-like decoration on apparel surfaces, compare DTF vs vinyl decals is a useful reference point because the substrate, not the artwork, decides the process.
Practical rule: choose the surface first, then the method. Most DIY waste happens when the design is picked before the material.
Tools and Materials You Will Need for Each Method
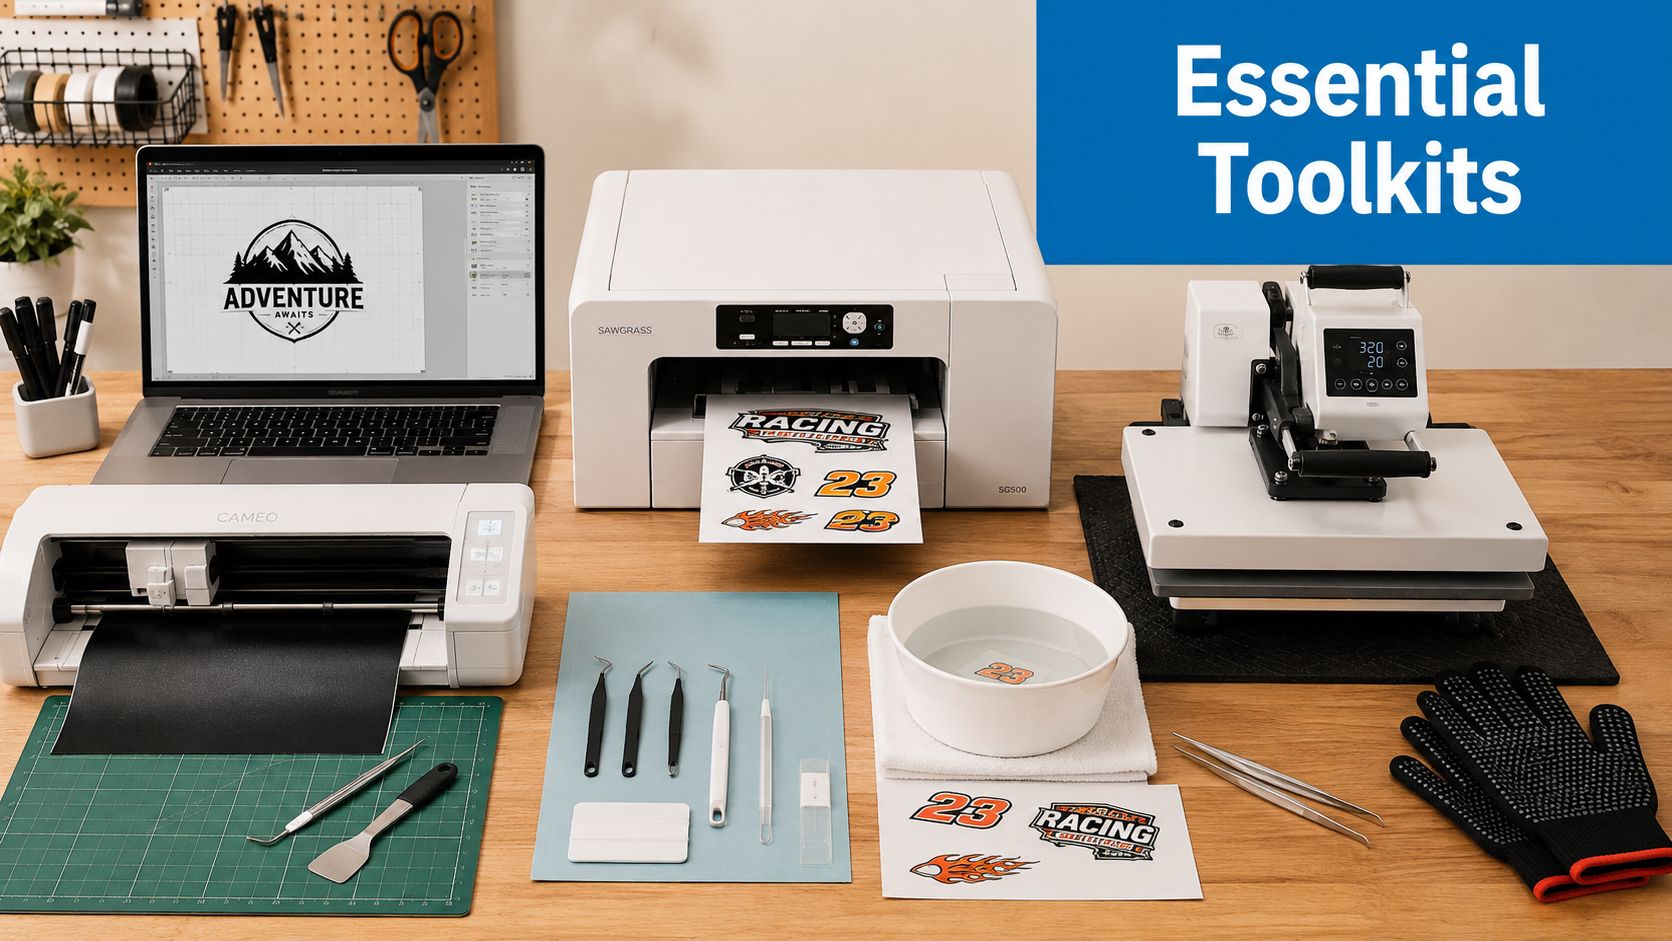
Vinyl cutter tools
For machine-cut adhesive vinyl, the cart should be plain: a cutter, cutting mat if your machine uses one, a weeding hook, a squeegee, transfer tape, and the vinyl itself. If you're just starting, the smallest setup is enough for names, logos, and simple shapes. A small-studio setup adds spare blades, cleaner mats, and a better scraper so you're not fighting lift during transfer.
Printable vinyl tools
Printable vinyl needs a printer that handles the stock cleanly, plus printable vinyl sheets, laminate sheets, scissors or a cutter, and transfer tape if the design gets applied in sections. A flat squeegee helps keep the laminate from trapping air. If the decal is going outdoors or onto something that gets handled, laminate is the part people skip and later regret.
Waterslide tools
Waterslide work is more delicate, so the supply list changes. You'll want waterslide paper, a printer compatible with that paper, clear coat or sealant if your paper type needs it, a shallow water tray, tweezers, and a soft cloth or scraper. Smooth application matters more here than force, because the film is thin and likes to fold if you rush it.
HTV tools
HTV needs the heat press or iron, heat-resistant tape, a weeding tool, parchment or a cover sheet, and the vinyl itself. Temperature settings matter enough that a separate temperature reference is worth keeping nearby, and a practical one is the heat press temperature guide. For apparel, the press does the heavy lifting, but only if the cut and weed are clean before it reaches the garment.
What to expect on startup
A hobby cart and a small-studio cart don't look the same. One is built to learn the workflow; the other is built to reduce wasted sheets, reprints, and crooked installs. If you're buying only once this month, keep it lean. If you're planning repeated orders, buy the tools that save your hands.
A cheap blade can cost more than a good one if it tears fine lettering three jobs in a row.
Preparing Artwork Files That Cut and Print Cleanly
A decal can look perfect on screen and still fail at the cutter because the file wasn't prepared for production. The biggest divide is vector versus raster. Vector art stays crisp at any size and is the safer choice for cut lines, while raster art needs enough resolution to hold detail at final size.
File setup that saves vinyl
For print jobs, aim for 300 DPI minimum when the art is raster, keep 0.125-inch bleed, and size the design at the final target surface before export. That way, what you approve is closer to what gets printed. The cut line should be a separate spot color so the software can read it cleanly, and live art should sit inside a safety margin so important edges don't get trimmed off.
Color mode matters too. RGB can look bright on screen, but print workflows usually need color managed carefully so the final result isn't a surprise. If the design includes fine text, tiny outlines, or a contour cut, test it at actual size before committing the whole sheet.
Rule of thumb: if you can't read it at final size on your monitor, the cutter probably won't love it either.
This is the part many AI decal tools skip. They'll generate something that looks ready, but they don't always deal with background cleanup, contour accuracy, or machine settings. A useful practical reference for the software side is making logos in Illustrator, especially if you're turning a rough idea into a file that can be cut or printed without wasting material.
Why pretty files still fail
A design with thin strokes, soft edges, or loose background elements can be a nightmare to weed. A file that looks clean in a browser preview can also print with banding or cut off the intended contour if the export settings are sloppy. The safest path is boring, not flashy, accurate sizing, clean edges, and a separate cut path that your software can read without guessing.
Step-By-Step Production for Each Method
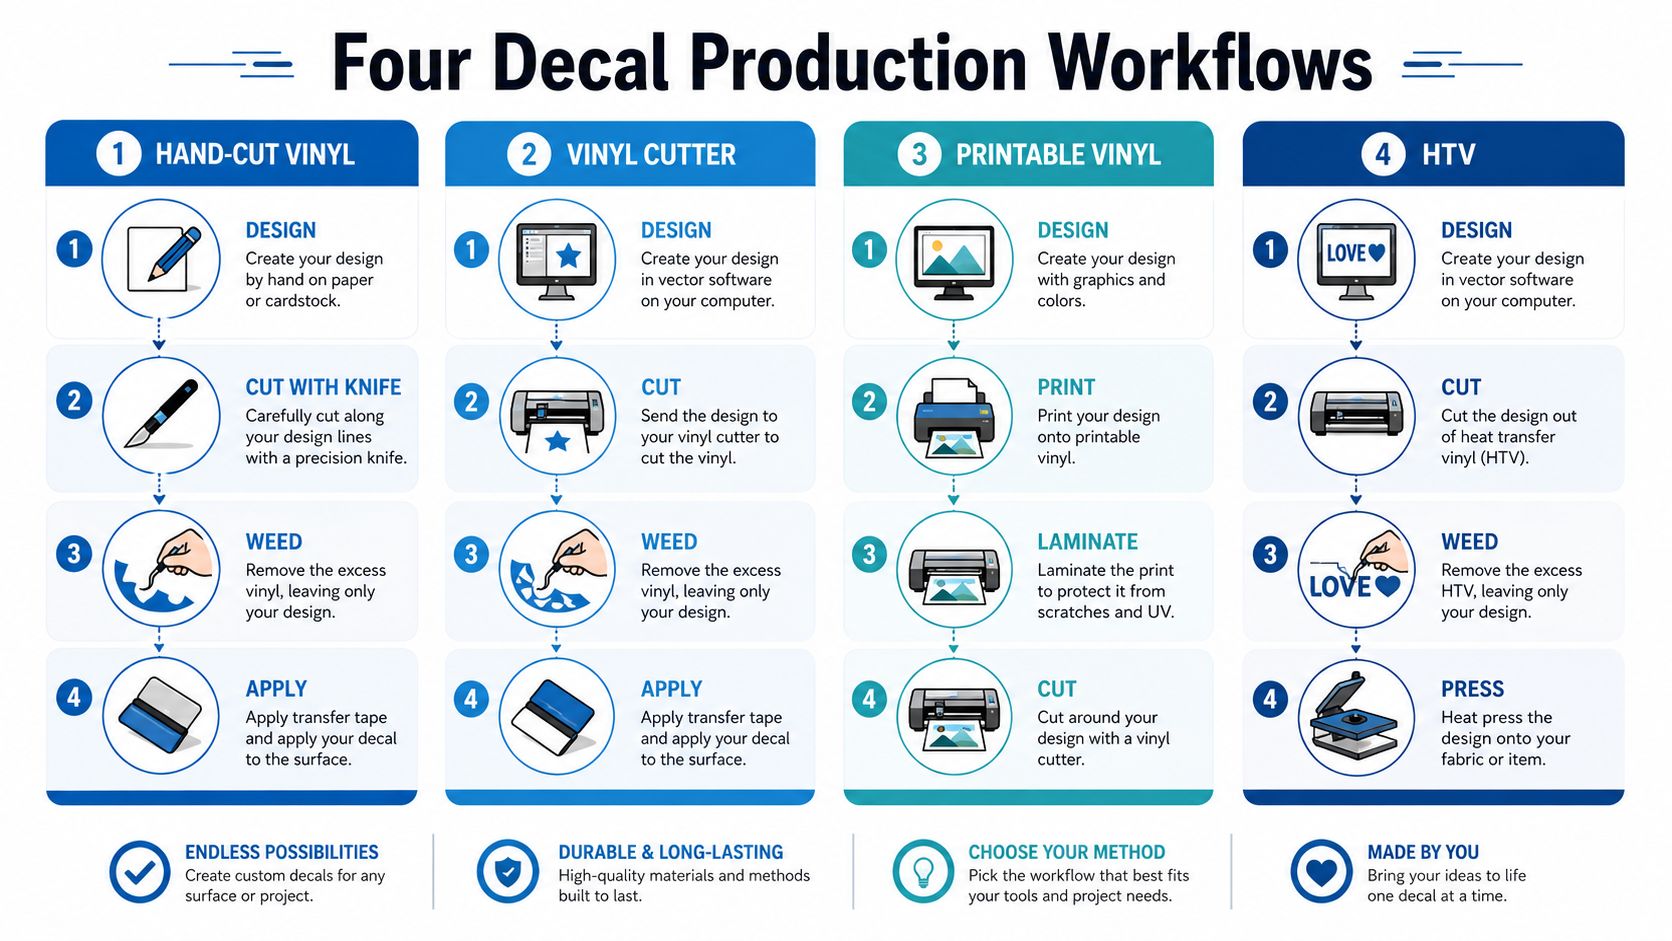
Hand-cut vinyl for one-offs
Start with a printed template on regular paper, then tape it to the vinyl and trim around the graphic with a knife or scissors. Leave enough margin to hold the template steady, then cut slowly enough that the blade follows the edge instead of slicing into the backing. The brief calls for a hand-cut method that can be done with a small toolset in about fifteen minutes, and that speed is real when the design is simple.
Vinyl cutter with adhesive vinyl
Load the correct material profile, confirm size, and run a small test cut before committing a full sheet. That test cut is the cheapest way to catch pressure or depth problems. Once the design is cut, weed the excess, apply transfer tape, and burnish it in two passes so small text doesn't lift when you peel.
Printable vinyl for full-color graphics
Print at final size, check orientation before feeding the sheet, then laminate after the print has set. Cut only after you've confirmed the print side and contour shape, because a flipped sheet or wrong-side feed can force a reprint. The printed layer does the visual work here, so treat the laminate and cut line as protection, not decoration.
Waterslide decals for models and smooth objects
For waterslide, the timing matters. One production guide in the brief recommends soaking the decal in water for roughly one minute before release, then sliding it into place. After that, use a soft tool to push out water and air, because a waterslide film can wrinkle if you try to drag it hard across the surface.
HTV for fabric
Mirror the art, cut the vinyl, weed the extra material, and press it with the correct heat and pressure for the garment. The design has to release cleanly before it reaches the fabric, because the press won't fix a bad cut. If the carrier lifts too early, stop and return to the seam or edge before you pull again.
For inspiration on quick concept generation, unique tattoo inspiration can be a useful starting point when you're mocking up shapes, but that's only the first half of the job. A visual idea still has to survive weeding, transfer, and the surface it's going onto.
Cost, Time, and Durability Compared Across Methods
The question often asked is whether DIY saves money once wasted material and time are counted. Sometimes it does, especially for small runs and simple graphics. Sometimes the cheap route becomes expensive because the same mistake gets repeated on every sheet.
| Method | Approx. Cost Per Decal | Time Per Piece | Best Surface | Skill Level |
|---|---|---|---|---|
| Hand-cut vinyl | Low for simple one-offs | Fast for simple shapes | Smooth, flat surfaces | Beginner to intermediate |
| Vinyl cutter with adhesive vinyl | Low to moderate | Fast after setup | Windows, signs, hard goods | Beginner to intermediate |
| Printable vinyl | Moderate | Moderate | Flat or lightly curved surfaces | Beginner to intermediate |
| Waterslide | Moderate | Slower and more delicate | Smooth, sealed, detailed objects | Intermediate |
| HTV | Moderate | Moderate | Fabric | Beginner to intermediate |
What each method gives back
Hand-cut vinyl is the cheapest path when you only need a few simple graphics and already own basic tools. It loses value fast when the shape gets intricate, because time spent weeding and recutting adds up.
Vinyl cutter work pays off when you repeat the same design often. It's the cleanest balance of speed and consistency for lettering, signage, and stickers.
Printable vinyl is the best compromise for full-color art when you need detail without moving into a commercial print run. The trade-off is that materials and finishing steps stack up, so it's not always the bargain it first appears to be.
Waterslide and HTV solve narrower problems. Waterslide is great for delicate presentation on smooth objects, while HTV is the right answer for garments. For broader branding programs, especially when the decal is part of a larger merch mix, a supplier that also handles apparel can keep the visual system consistent. Dirt Cheap Product, Inc. is one example of a branding partner that works across decorated garments and promotional items, which matters when decals are only one piece of a campaign.
For a broader production comparison, screen printing vs vinyl helps frame where cut graphics make sense and where another decoration method is more efficient.
Application, Surface Prep, and Fixing Common Problems
A good decal still fails on a dirty or textured surface. Wipe the area with isopropyl alcohol, let it dry fully, and check for silicone residue, wax, or other coatings that can block adhesion. If the surface is rough, curved, or uneven, the decal may need a different material or a different decoration method entirely.
Transfer and alignment basics
Use masking tape hinges to hold the decal in position before you commit to the full stick. That keeps the art aligned while you peel the liner away. Once the decal is in place, burnish the transfer tape and then peel at a low angle so the details stay put.
Fixing the usual failures
Edge lift usually means the surface wasn't prepped well or the pressure was too light. Re-clean, press again, and give the adhesive a fair shot.
Bubbles are usually a placement problem or a rushed press. Work them out with a squeegee or soft card before they harden in place.
Silvering under laminate points to trapped air or poor surface finish. A smoother base and slower lamination pass reduce it.
Tearing during transfer usually comes from overcutting, weak burnishing, or a peel that's too aggressive. If a letter stays on the backing, lay the tape back down and burnish again.
The practical difference between a good install and a bad one is patience. A decal peeled slowly, at a low angle, survives better than one yanked off the carrier because someone got impatient.
For a compact reminder on decal edge cases and product choices, custom decals is a useful comparison point on how decal-style products are presented for fast-turn orders.
When to Stop DIY and Outsource to a Professional Supplier
DIY is the right move when the design is simple, the quantity is small, and the deadline is flexible. Outsourcing starts to make more sense when you need large quantities, tight turnaround, precise color matching, or work that has to coordinate with garments and promotional items. Compliance-heavy projects and apparel runs also tip the scale toward a supplier that can manage proofs and decoration methods without guesswork.
What to look for in a supplier
A serious supplier should show clear turnaround expectations, usable material options, and support from a rep who can help with artwork, placement, and proofing. If they also offer screen printing, embroidery, DTF, sublimation, and patches, you can keep a brand's look consistent across uniforms, merch, and add-on pieces instead of cobbling everything together from separate vendors.
That consistency matters when decals sit beside shirts, hats, and event giveaways. A supplier that handles the whole decoration mix can keep the campaign visually aligned without making you become the production manager.
When the job has crossed that line, the decision isn't about pride, it's about avoiding waste. If you're still testing a concept, DIY is fine. If you're repeating a proven design across multiple products, outsourcing is usually the cleaner path.
Quick action list
- Stay DIY: simple shape, small quantity, flexible deadline.
- Buy tools: if you'll repeat the same decal more than once.
- Request a quote: if the project needs apparel, proofs, or multiple decoration methods.
If you're ready to move from trial pieces to polished branded products, visit Dirt Cheap Product, Inc. and see how a single logo can carry across decals, apparel, and promo items without turning into a production headache. If your next project needs clean artwork, fast proofing, and consistent decoration across multiple products, they can help you line up the whole order before you spend another afternoon re-cutting vinyl.