
You've got a stack of shirts to decorate, the artwork is ready, and the clock is already moving. One order needs bright prints for a school fundraiser, another needs mixed cotton and polyester tees for a staff event, and nobody wants a surprise when the boxes arrive. That's the kind of situation where DTF printing T shirt production starts to make sense, because it can handle different fabrics, strong color, and short timelines without forcing every garment into the same process.
For a quick primer on the general idea, this overview of what DTF printing is helps frame the basics before the details get specific. The important part is that DTF is not just a decoration method, it also affects how a job is planned, priced, and checked before approval.
Table of Contents
- Introduction to DTF Printing T Shirt
- Understanding DTF Printing Key Concepts
- Production Workflow Explained
- Artwork and File Preparation Best Practices
- Substrate Compatibility Durability and Wash Care
- Comparing DTF with DTG Screen Printing and Heat Transfer
- Cost Turnaround Troubleshooting and Ordering Tips
- Conclusion and Actionable Next Steps
Introduction to DTF Printing T Shirt
A nonprofit coordinator sends out a rush order for event shirts on Monday and needs them wearable by Friday. The order includes cotton tees for volunteers, polyester shirts for staff, and a few mixed-blend sizes that would normally complicate production. DTF printing fits that kind of job because it handles multicolor art and mixed fabrics without forcing a separate setup for each shirt type.
That flexibility is the main reason so many buyers keep coming back to it. A DTF transfer is printed first, then moved to the shirt with heat and pressure, so the shop can prepare artwork in advance and apply it to different garments later. In practical terms, that means fewer surprises when the order spans multiple fabric types, colors, or size runs.
The appeal is not only technical, it's also operational. When a team can review a proof quickly, confirm placement, and keep the same graphic moving through the order, the whole process feels less like custom art roulette and more like a repeatable shop workflow. For anyone buying branded apparel for events, retail, uniforms, or promotions, that predictability matters as much as the print itself.
Understanding DTF Printing Key Concepts
A direct-to-film shirt begins life on a special sheet of PET film, not directly on the garment. The design is printed onto that film, then moved onto fabric with heat and pressure, which is why it's better understood as a two-step transfer than as direct garment printing, according to a beginner guide to DTF printing meaning. That simple distinction explains a lot about why the method behaves differently from DTG or screen print.
Why the white layer matters
DTF uses white ink to build an opaque base under the color layer. That base helps the artwork stay bright on dark shirts and keeps the design readable across cotton, polyester, and blends, including garments of any color, as described in Brildor's overview of DTF printing. This functions similarly to applying white primer before painting a wall; the color stays cleaner because it isn't fighting the fabric color underneath.
The white base is doing quiet but important work, it's what lets the same art stay visible on light and dark garments.
How DTF differs from other methods
Screen printing uses stencils and ink pushed through mesh, which is efficient for repeat jobs but less flexible when the art changes a lot. DTG sprays ink directly onto the garment, which can feel softer but depends more heavily on the shirt and the machine setup. DTF sits in between those worlds, a transfer workflow with the versatility of digital art and the practical reach of a press-ready transfer.
The method also matters because it broadens the fabric options. Industry guidance describes DTF as working across cotton, polyester, synthetic fabrics, and silk with the right press settings, which gives buyers more freedom when the order includes mixed apparel. That's why the process has become attractive for workwear, retail tees, and event shirts that aren't all made from the same cloth.
Production Workflow Explained
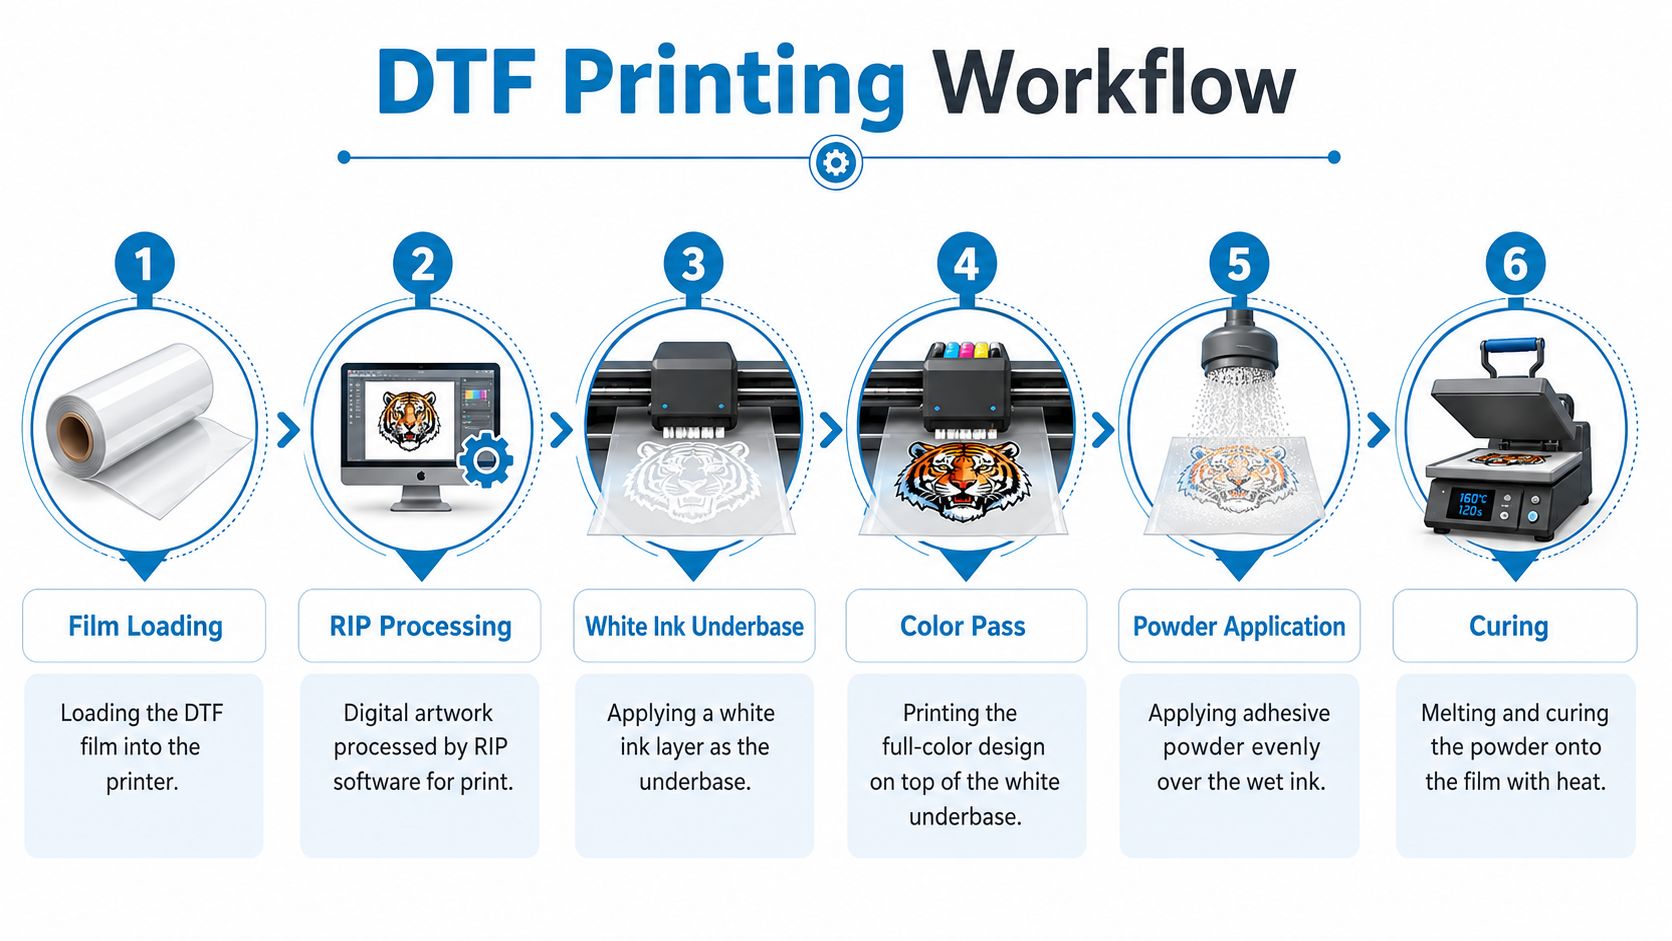
A clean DTF job follows a sequence that feels a lot like baking in a commercial kitchen. Each step has a purpose, and if one step goes off, the final shirt shows it. DTF's historical importance comes from this newer transfer-based process, where the design is printed to PET film, coated with curing powder, then fused to fabric with heat and pressure, with practical press guidance commonly listed at 320–350°F (160–180°C) for cotton blends and 10–15 seconds of pressing time, while synthetics often use 280–300°F (140–150°C), according to DTF shirt printing guidance.
The production path usually starts with film loading and RIP processing. The printer needs the art interpreted correctly before anything touches the film, because the software separates the layers and makes sure the white ink lands where it should. After that comes the color pass, which builds the visible artwork on top of the white underbase.
The powder and cure stage
Once the print is wet, adhesive powder is applied evenly. That powder becomes the bridge between ink and shirt during the press. Then the film is cured so the powder melts and grabs the ink without turning the transfer gummy or patchy.
Even a good print can fail if the powder is uneven, because the press can only bond what's actually there.
A short-run example
A shop printing 50 event shirts overnight usually batches the work to keep setup time under control. The art may stay the same, but the job still needs orderly handling, because one shirt size, one fabric blend, or one misplaced transfer can slow the whole stack. That's why shops check the film before pressing, confirm the garment is clean and dry, then finish with a final press to lock in the transfer.
The last step is post-press finishing. During this stage, the transfer settles into the shirt and the surface gets a cleaner final appearance. When a shop keeps each stage organized, the order moves from file to finished apparel without that rushed, patched-together feeling buyers hate.
The workflow is easier to understand when you see it move from software to film to fabric. The embedded video below shows the process in motion, which helps connect the written steps with the production line rhythm.
Artwork and File Preparation Best Practices
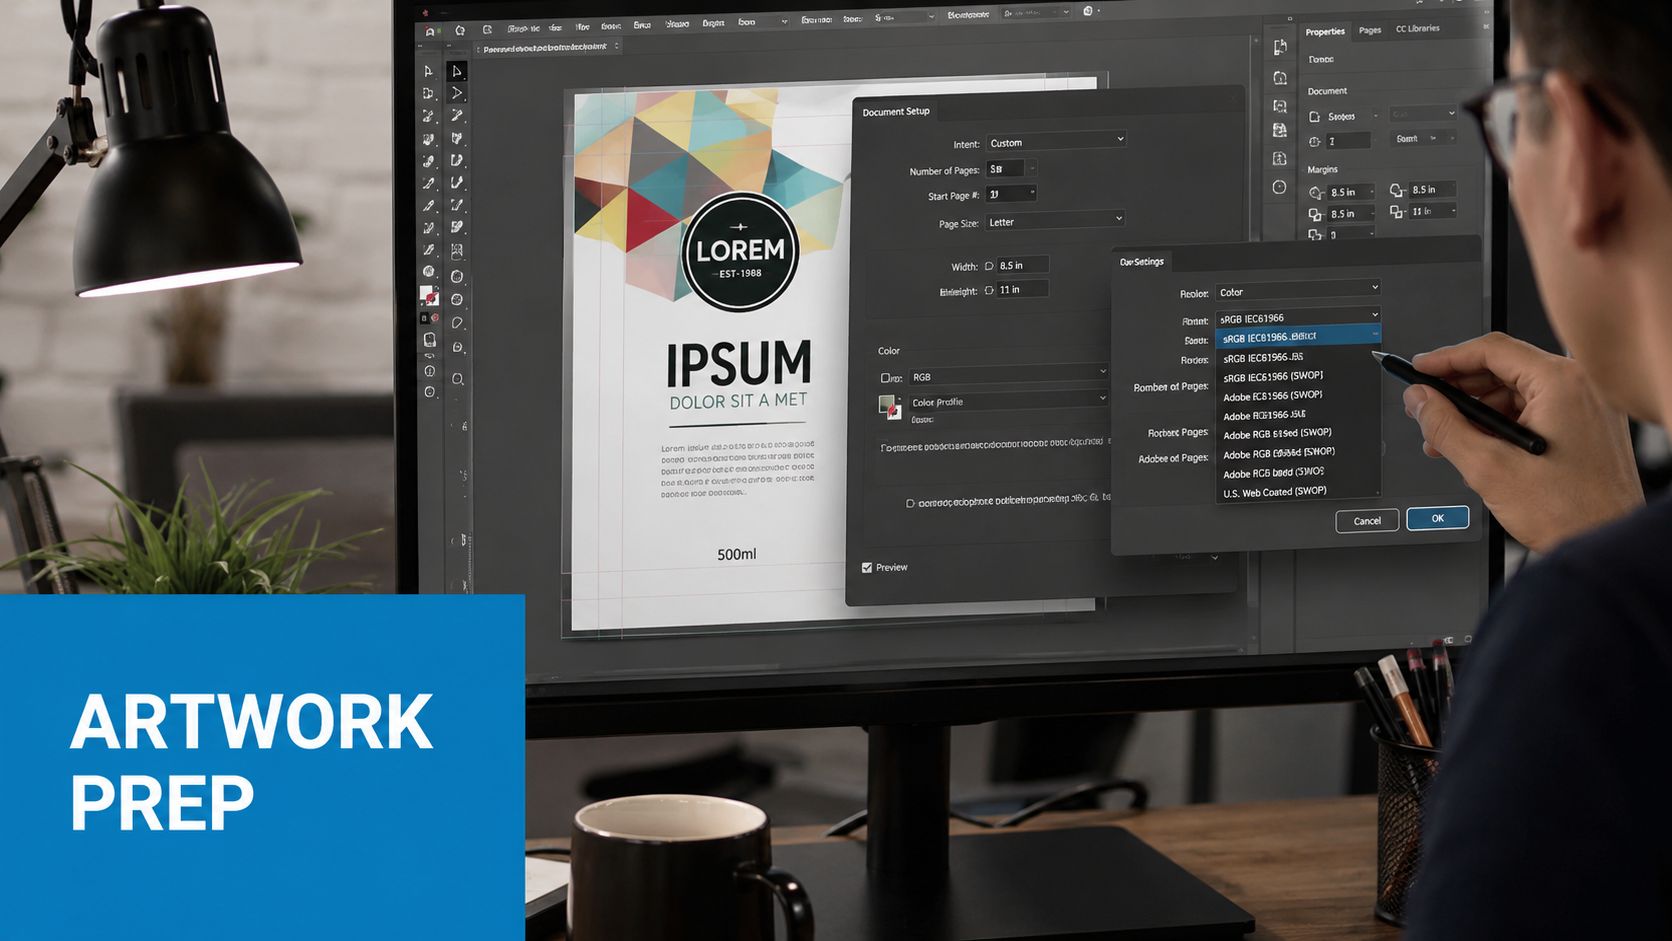
The cleanest transfer in the world won't save a blurry file. DTF artwork needs to be prepared at 300 DPI at the final print dimensions so edges stay crisp and the color separations survive the RIP process, according to DTF file requirement guidance. For full T-shirt graphics, that same guidance commonly points to sizes around 10–12 inches, while pocket or left-chest logos are often around 3–4 inches.
Build the file like it will be inspected up close
The safest file types are the ones that preserve detail and transparency well, such as PNG, PSD, AI, and PDF. Transparent backgrounds matter because the transfer should carry only the artwork, not a box of unwanted color around it. If the file needs a white underbase or white separation, that should be planned before the proof stage, not discovered after the printer has already processed the job.
For designers moving from web graphics to print, the color setup also matters. A practical resource on RGB to CMYK conversion can help prevent the common mistake of assuming screen color will look identical on garment film. The bigger lesson is simple, files made for phones and web banners usually need cleanup before they're print-ready.
Checklist before you send the proof
- Confirm final size first: A shirt graphic sized for a full chest is not the same as a left-chest logo.
- Keep small details legible: Thin lines and tiny type can break up when the file is too small or too soft.
- Use transparent artwork when needed: Solid background boxes often create avoidable cleanup work.
- Check the color profile early: A file that looks fine on a monitor can still shift when processed for print.
If a logo already looks fuzzy on your screen at the right size, it won't get sharper on film.
A common error is upscaling a low-resolution image and hoping it survives the print path. Another is sending artwork without the right layers or transparency and expecting the shop to guess the intended result. The file that performs best is the one built for the shirt from the start, not the one rescued at the last minute.
Substrate Compatibility Durability and Wash Care
DTF's reach is broad because the white underbase helps it sit on top of the fabric instead of disappearing into it. It's explicitly described as compatible with cotton, polyester, and blends, including garments of any color, because the white ink creates an opaque base, according to Brildor's DTF printing guide. That matters for buyers because one artwork setup can move across light tees, dark tees, work shirts, and many blended garments.
Which fabrics fit the process best
Cotton usually gives a straightforward press, especially when the shirt is pre-pressed to remove moisture. Polyester often needs a little more caution with heat, because the fabric reacts differently than cotton and can mark if the settings are too aggressive. Blends sit between those two, which is why many shops like them for event orders that need consistent results across multiple sizes and styles.
Before pressing, the garment surface should be clean and dry. Moisture, lint, or stray fibers can interfere with the transfer bond and leave weak spots or rough edges. A quick pre-press removes some of that risk by flattening the fabric and pushing out trapped humidity.
Wash care that protects the print
The durability goal is simple, keep the transfer bonded and avoid unnecessary stress in the wash. Industry guidance notes that properly made transfers are expected to last 50+ washes, which is one reason DTF is treated as a serious option for branded apparel and retail tees. To help the print reach that level, laundering should be gentle, and the shirt shouldn't be abused with harsh handling.
- Wash inside out: That reduces surface rubbing during the cycle.
- Use a gentle routine: Strong agitation can wear on the print edge over time.
- Keep heat under control: High dryer heat is harder on decorated garments than a cooler dry.
- Follow peel guidance: Some films are cold peel, so the transfer has to cool before the carrier comes off.
A shirt that leaves the press looking sharp can still fail later if the customer washes it roughly. That's why wash instructions matter as much as the artwork proof. The print doesn't live only in the shop, it has to survive the customer's laundry room too.
Comparing DTF with DTG Screen Printing and Heat Transfer
The best decoration method depends on the order, not the hype. DTF is often the strongest fit for mixed fabrics, multicolor artwork, and short runs, while screen printing tends to shine when a simple design repeats across a large quantity. DTG is useful when the garment and artwork fit its direct-print workflow, and heat transfer methods can be practical when a buyer wants a simple image moved quickly onto a shirt.
Side by side comparison
| Method | Cost Range | Color Support | Fabric Compatibility | Minimum Run | Turnaround |
|---|---|---|---|---|---|
| DTF | Low to mid, varies by transfer and whether it's printed in-house or outsourced | Strong multicolor support | Broad, including cotton, polyester, and blends | Good for short runs | Fast for small and mixed orders |
| DTG | Varies by garment and print setup | Strong color range | Best on compatible garments, usually more selective | Better for one-offs or small batches | Can be quick on direct prints |
| Screen printing | Can be efficient at volume | Best for simpler color counts | Works well on many garments | Stronger at larger runs | Slower setup, faster once running |
| Heat transfer | Usually practical for simpler jobs | Good for artwork that suits transfer media | Depends on transfer type and garment | Useful for small batches | Often fast for straightforward orders |
For buyers trying to sort through the options, the DTG versus DTF comparison is useful because it frames the decision around workflow, not just appearance. A separate resource on flawless infusible ink projects can also help buyers think about when transfer-based decoration is the right fit for a specific garment or craft-style project.
How to choose without overcomplicating it
If the order includes several fabrics and a mix of sizes, DTF usually gives the smoothest planning experience. If the design is simple and the quantity is high, screen printing can become the more efficient route. If the garment itself is very specific or the order is highly individualized, the buyer should compare the garment, artwork, and timing before committing.
Choose the method that fits the order you actually have, not the one that sounds easiest in theory.
Cost Turnaround Troubleshooting and Ordering Tips
Industry calculators estimate the transfer alone at $0.50–$3.00 per shirt, while the full finished shirt often lands around $4–$15 once the blank garment, labor, and overhead are included, with many custom-apparel businesses pricing retail shirts around $15–$35, according to DTF cost and economics guidance. A separate model puts an in-house printed shirt at about $2.80–$6.50 all-in, versus $5–$8 when the transfer is outsourced, which shows how much the economics shift depending on whether a shop prints transfers itself or buys them from a supplier.
What changes turnaround
Small runs move differently from larger jobs because batching matters. A simple order can often move quickly if the artwork is ready and the garments are known, while bigger mixed orders need more sorting, more placement checks, and more time at the press. The shirt count affects how long the job sits in the queue, but the quality risk usually comes from organization, not size alone.
Troubleshooting the most common problems
- Weak adhesion: Check whether the garment was pre-pressed and whether the press settings matched the fabric.
- Color shift: Review the file setup and proof before blaming the print.
- Haloing around the design: Look for excess powder, moisture, or uneven pressing.
- Powder clumping: Recheck the adhesive application and make sure the film was handled cleanly.
A shop can usually trace the problem back to one of three places, the file, the fabric, or the press process. That's why the ordering conversation should include garment type, print size, placement, and turnaround in the first round of communication.
Ordering checklist that prevents rework
- Approve the proof carefully. Confirm the artwork, spelling, size, and position.
- Match the garment to the design. Cotton, polyester, and blends don't always behave the same way under heat.
- Confirm placement dimensions. Left-chest, sleeve, and full-front art should each be sized intentionally.
- Ask about timing early. Rush jobs need a clear queue position, not a vague promise.
- Review the final sign-off. A last check before production prevents avoidable reprints.
If you're handling shirt placement for different garment types, the practical fit matters a lot. Left-chest, sleeve, and body-fit changes can make a design look centered on one size and awkward on another, so the best orders treat placement as a specification, not an afterthought.
Conclusion and Actionable Next Steps
DTF printing T shirt orders work best when the buyer treats the process as both a design choice and a production choice. The method gives you broad fabric compatibility, strong color on dark garments, and a pricing structure that can work for short runs, but the result still depends on clean files, the right garment, and a clear proof. When those pieces line up, DTF becomes a practical way to turn mixed apparel into a consistent branded order.
The safest next step is simple. Lock in the artwork size, verify the fabric mix, confirm placement, and request a proof before production starts. That keeps the order from drifting between what was imagined and what arrives in the box.
If your team is planning a branded apparel run, contact Dirt Cheap Product, Inc. for samples, a detailed quote, and expert help on your next custom shirt order.