
You can spot a weak embroidery backing stabilizer before the hoop comes off the machine. The letters pull inward on the polo. The fill looks grainy instead of smooth. Then the manager asks why the logo that looked perfect on screen now feels like it fought the garment all the way through stitchout.
That's the true test of embroidery backing stabilizer. It's not there to make the job feel more finished on the back side, it's there to hold fabric steady while the needle hammers through it, then keep the shape honest through wear and washing. If you've ever compared a clean logo on a stable woven with a puckered logo on a stretchy polo, you've already seen the difference backing makes in production.
Historically, decorators used whatever support they could get, linen linings, muslin, paper, and stiff interlinings, until purpose-made commercial products took off in the late 1970s as machine embroidery and apparel branding sped up demand for cleaner registration and a softer hand-feel (historical overview of stabilizer development). Earlier machines like Josué Heilmann's 1828 hand-embroidery machine and the Schiffli machines of the 1850s made backing more important because the fabric had to stay put under faster stitching speeds (same historical overview).
For a real-world reference point, take a look at high quality embroidered caps. Caps show how much the backing underneath matters when the front panel is stiff, curved, and unforgiving.

Table of Contents
- Why Backing Stabilizer Makes or Breaks an Embroidered Logo
- How Stabilizer Works Under the Needle
- The Main Stabilizer Types and What Each One Is For
- Matching Backing to Fabric and Garment Type
- Hooping, Layering, and Adhesive Technique
- Troubleshooting Puckering, Show-Through, and Thread Breakage
- Business and Order Considerations Behind Stabilizer Choice
- A Quick Decision Framework for Your Next Garment
Why Backing Stabilizer Makes or Breaks an Embroidered Logo
A polo comes off the machine, and the first thing everyone sees is the same problem: the edge of the fill has tightened the shirt into a shallow bowl. The design didn't fail because the digitizing was bad. It failed because the fabric moved more than the backing could control.
What the backing was actually doing
Embroidery backing stabilizer sits behind the garment in the hoop, so the needle stitches through the fabric and the backing together. That shared structure matters because the stabilizer resists the lateral pull of dense stitches and helps prevent puckering, distortion, and stitch pull-through during wash and wear (Madeira technical guidance). In plain shop-floor terms, it's the thing that keeps a lightweight shirt from behaving like wet paper while the machine is punching a logo into it.
The best comparison is a sub-floor under tile. The tile can look great, but if the floor underneath flexes, the surface cracks or shifts. Backing works the same way, it supports the stitch structure so the design stays flat and readable instead of collapsing into the garment's movement.
Practical rule: if the garment stretches or the design is dense, treat backing like part of the construction, not an optional supply.
That's why a clean logo on a stable woven can look easy, while the same artwork on a soft performance knit suddenly needs more thought. Brother's guidance ties stabilizer choice directly to whether the fabric stretches and whether the backing will remain hidden or touch skin, which is exactly how decorators should think about it in production (Brother stabilizer guidance).
If the stabilizer is too light, the fabric collapses into the design. If it's too heavy for the garment, the back can feel stiff or show through. The right answer is not “use the least amount possible,” it's “use enough structure to finish with a flat front and a wearable back.”
How Stabilizer Works Under the Needle
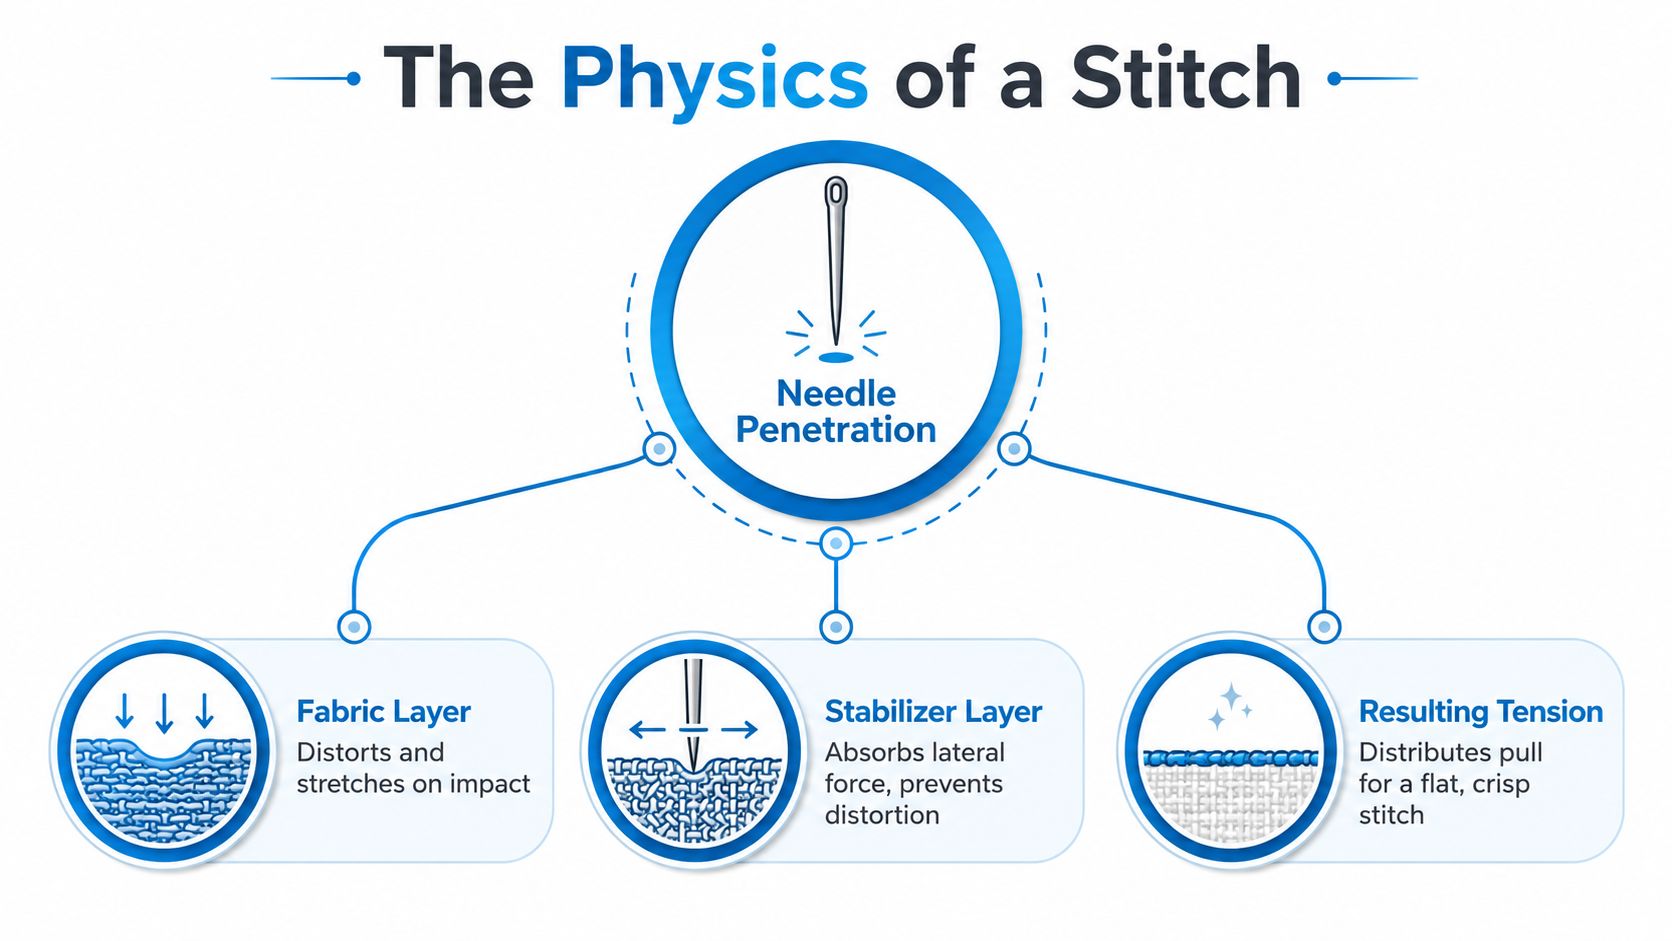
Every stitch starts as a small impact, but a dense logo turns that impact into a system. The needle pierces the top fabric, the thread tightens, and the fabric tries to move away from the force. The backing absorbs that movement so the stitch lands where it was digitized to land.
The two jobs it has to do
First, backing stabilizer has to support the garment during stitching. That means resisting fabric motion while the machine pushes thousands of penetrations through the same area. Second, it has to keep supporting the stitch field after the piece leaves the hoop, because the garment still flexes when it's worn and laundered (Embroidery backing basics).
That second job is why weight matters. Commercial guidance says backing weight should match fabric weight, and dense designs in the 18,000- to 50,000-stitch range generally need heavy cut-away instead of light support, because weak stabilization leaves puckering and fabric pull that can remain visible after laundering (Madeira stabilizer brochure). Heavy stitching is basically repeated stress in the same zone, and the backing has to hold the shape long enough for the thread to lock into a stable matrix.
A lot of decorators like to think of stabilizer as a consumable. That's the wrong mental model. It's structural support, and structural support has to match the load.
The machine doesn't care whether the shirt is expensive or not. It only cares how much resistance the fabric can give before it moves.
Reading the fabric like a substrate
Once you start looking at garments this way, the decision gets easier. Stretchier knits need more support because they recover and shift under tension. Stable wovens can usually get by with less because their weave already resists movement better. The job is to match the backing to the substrate, then adjust for design density and stitch count instead of relying on a one-size-fits-all habit.
For digitized logos, a clean stitch file matters too, because underlay, density, and pull compensation all influence how hard the backing gets worked. A practical overview of logo setup is available in this digitizing guide for embroidery logos, and it pairs well with what the backing is doing under the cloth.
The Main Stabilizer Types and What Each One Is For
A good shop shelf usually has a few repeat players, not a chaotic pile of random products. Brother groups the main stabilizer classes as cut-away, tear-away, water-soluble, and self-adhesive (Brother FAQ). Each one earns its place by solving a different production problem.
Cut-away, tear-away, and specialty backings
Cut-away is the permanent option. It stays in the garment after stitching, which is why it's the safest choice for knits, fleece, and other fabrics that keep trying to stretch back out. Commercial guidance also notes that cut-away is often sold in measured weights such as 2.5 oz medium backing (Brother FAQ). If you use it on a stable woven that doesn't need that much reinforcement, you can create unnecessary stiffness or show-through.
Tear-away is the fast-removal option. It works well on stable wovens like denim, canvas, and many hats, because the garment itself holds shape while the backing is only needed during the stitchout (Brother stabilizer guidance). If you put tear-away under a stretchy knit that will be washed and worn hard, you're asking the garment to do the stabilizer's job after the fact.
Water-soluble backing is the specialty choice for lace, freestanding work, or visible-back applications where you don't want backing left behind. Brother also uses it for delicate or visible-back jobs where the backing may touch skin or remain visible (Brother stabilizer guidance). It solves a presentation problem, but it's not a substitute for structural support when the fabric itself needs reinforcement.
Self-adhesive backing is the problem-solver for hard-to-hoop items, especially caps, pockets, and pieces where you need the material to stay put without forcing the hoop over awkward bulk. It's a setup tool as much as a stabilizer tool.
Topper materials deserve their own mention
A topper sits on top of the fabric, not behind it, and that matters on fleece, towels, and other napped surfaces. It keeps stitches from sinking into pile and helps the design stay visible. For the exact wrong use case, skip it on smooth surfaces where it adds no value and can slow production.
| Stabilizer Type | Best For | Stays In Garment? | Watch Out For |
|---|---|---|---|
| Cut-away | Knits, fleece, dense logos | Yes | Can feel heavy or show through on thin garments |
| Tear-away | Stable wovens, many hats, denim | No | Not enough long-term support for stretchy fabrics |
| Water-soluble | Lace, freestanding work, visible backs | No, rinsed away | Doesn't replace structural backing on unstable fabric |
| Self-adhesive | Caps, pockets, hard-to-hoop items | Usually removed or left as system requires | Can save a bad hooping job, but won't fix poor digitizing |
| Topper | Fleece, towels, textured knits | Removed after stitching | Not a backing substitute |
Matching Backing to Fabric and Garment Type
A decorator can get away with a generic answer on some jobs. On others, that shortcut shows immediately. A cotton tee, a poly performance shirt, and a structured cap may all carry a logo, but they don't ask the backing to do the same work.
The fabrics that punish lazy choices
Cotton T-shirts usually want medium-weight cut-away when the design is anything beyond light and open. Cotton is more stable than some blends, but it still moves enough under dense stitching that a permanent backing often produces a cleaner result.
Poly-performance tees are the tougher case. They stretch, recover, and can show needle damage if the setup is rough, so the backing choice has to balance support with hand-feel. Brother's guidance says stretchy fabrics such as T-shirts and polos generally need cut-away, while stable wovens often do well with tear-away (Brother stabilizer guidance). The edge case is a stable performance knit that still feels firm enough for lighter support, but that's a judgment call, not a default.
Pique polos often need more backing than a plain knit tee because the texture creates uneven support under the stitches. Dense embroidery on a polo front usually behaves better with cut-away, especially when the logo has filled areas.
Fleece needs a different kind of help. The pile swallows stitches, so a topper is usually part of the answer, and the backing has to support the base fabric while the surface film keeps the design readable.
Denim and canvas jackets are usually tear-away territory because the base fabric is stable, but dense artwork on a thick jacket panel can still justify a stronger backing or a floating layer if the piece is fighting the hoop. For those jobs, the garment is stable, but the thickness and bulk create their own setup issues.
Production note: if the fabric is stable but the stitch field is heavy, the decision shifts from “does it stretch?” to “can the surface stay flat under density?”
Useful edge cases
A tri-blend tee can fight the hoop even when it looks soft and harmless. A structured cap front may need layered support because the buckram or stiff front panel changes how the needle penetrates. And a delicate item may need a backing choice driven more by hand-feel and appearance than by raw reinforcement.
For practical examples of logo work across apparel, custom logo embroidery is a useful reference point for seeing how different garments force different support decisions. When embroidery enters retail or uniform production, the backing choice follows the garment, not the logo alone.
Hooping, Layering, and Adhesive Technique
Good backing can still fail if the hooping is sloppy. If the garment floats inside the frame or the stabilizer is slack under the hoop, the machine will expose that mistake fast.
Setup has to be treated as one system
Cut enough backing so the hoop grabs solid material on every side. Don't trim it so tight that it slips, and don't leave giant tails that snag the machine or get caught under the hoop. The backing needs to stay flat and under tension, not folded or wrinkled.
For thick items like caps and layered garments, floating the backing under the piece can work better than forcing the hoop through too much bulk. The point is to keep the fabric face flat and avoid crushing a surface that needs to stay smooth. If the garment is delicate, tight hooping can leave marks that outlive the stitchout.
A light spray adhesive earns its keep when the fabric wants to drift before the first few tie-in stitches lock everything down. Use it sparingly. Too much adhesive makes cleanup harder and can leave residue where you don't want it.
When layering makes sense
A common production move is to layer a tear-away on top of a cut-away for dense designs on caps and structured items. That gives you the long-term support of the cut-away with the extra surface control of the tear-away during stitchout. It's a practical workaround when the front panel needs both firmness and a cleaner tear-off on the visible side.
- Use layer stacking on dense caps: It helps control the front panel while still leaving a permanent support base.
- Float bulky items when hoop pressure is risky: This avoids hoop marks and distortion on thick or textured goods.
- Keep adhesive light and even: It should hold placement, not soak the fabric.
- Check hoop tension before you start: Too loose and the garment moves, too tight and you crush the fabric.
The best setups feel boring. The piece lays flat, the stitches fall where they should, and nothing surprises you at trim time.
Troubleshooting Puckering, Show-Through, and Thread Breakage
When a logo comes off wrong, the fix usually starts with the backing choice, not the machine. The trick is to identify which failure you're seeing and stop blaming the wrong variable.
Three failures, three likely causes
Puckering means the fabric is dimpling around the stitches. Most of the time, that points to backing that's too light, missing, or mismatched to the fabric and stitch density. If the garment is stretchy and the backing behaves like it isn't there, the fabric will pull inward when the machine finishes the fill.
Show-through happens when backing becomes visible through a thin or light-colored garment. That can mean the wrong stabilizer type was used, or that too much cut-away was chosen for a garment that didn't need it. Brother's guidance on backing choice ties the decision to whether the fabric stretches and whether the backing will remain visible, which is exactly the right lens here (Brother stabilizer guidance).
Thread breakage often gets blamed on thread quality, but stabilizer can be part of the cause. If the backing is too stiff, too dense, or hooped too tightly, the needle meets more resistance and the thread snaps more easily. A strong backing can still be the wrong backing if the setup overworks the needle path.
For a broader shop reminder on thread setup and color handling, this embroidery thread color guide is a useful companion. Thread and backing have to behave together, not in separate silos.
If the stitch breaks keep happening in the same place, check the fabric support before you blame the spool.
The quick mental checklist
Start with the fabric. Then check stabilizer weight, hooping tension, and needle choice in that order. Most production mistakes live in one of those four places, and fixing the right one saves time on the next piece instead of just patching the current one.
Business and Order Considerations Behind Stabilizer Choice
Backing choice changes the finished look, but it also changes how the order gets approved, worn, and billed. A client may not know the difference between cut-away and tear-away, yet they'll absolutely notice when a uniform collar feels stiff or a logo starts to wrinkle after laundering.
Permanent cut-away usually means the care conversation matters more, especially on uniforms that will see repeated wash cycles. If the backing stays in the garment, that's part of the wear experience, and it should match the client's expectations before production starts. Proofs are the time to catch that, because a stabilizer change is easier to approve before the run than to explain after delivery.
There's also a simple production reality, standardizing backing choices keeps work moving. If most of the catalog lives in one fabric family, a shop can move faster by using the same backing profile across those garments. Specialty items are different. A cap, a fleece jacket, or a delicate piece may justify a different support plan because the order outcome matters more than shop convenience.
For a client-facing example of how custom decoration gets packaged into a finished order, custom logo embroidery shows why the support choice behind the logo is part of the final product, even if the customer never sees it. And for soft specialty items that need a different kind of handling, custom text for minky projects is a good reminder that delicate surfaces usually need more than a standard backing answer.
A Quick Decision Framework for Your Next Garment
Start with fabric behavior, stretch or stable. Then estimate design density and stitch count, because a light logo and a dense fill do not need the same support. Match that answer to the stabilizer family, then adjust weight or layering for the garment type in front of you.
A standard cotton tee usually points to cut-away. A performance polo still usually leans cut-away, but the hand-feel and design size deserve a closer look. A structured cap often needs layered support or a self-adhesive setup, and a denim jacket usually works better with tear-away or a floated construction depending on thickness. Delicate items should push you toward specialty backing, not brute-force support.
If you remember only one thing, remember this. Stretch plus density means stronger backing. Stable woven plus light decoration means lighter backing.
Dirt Cheap Product, Inc. handles embroidered apparel, hats, and branded uniforms with the kind of production support that makes backing choices matter from the start. If you're planning a decorated order and want clean stitching, fast proofs, and help matching the right garment to the right decoration method, visit Dirt Cheap Product, Inc. and get your project moving.