You're probably in the exact spot where most apparel buyers get stuck. The logo is ready, the garments are picked, and then one simple question slows everything down: where should the embroidery go?
That question matters more than you might expect. A good logo can still look off if it sits too low, too far toward the armhole, too close to a placket, or too large for the garment. On the other hand, a modest design placed correctly can make a polo, jacket, or cap look polished and intentional. That's the difference between branded apparel that feels professional and apparel that looks like an afterthought.
I've seen clients focus hard on thread colors and file prep, then approve placement without really checking it. That's where avoidable mistakes happen. The fix is simple. Use a reliable placement guide for embroidery, understand the logic behind the measurements, and communicate the placement in production terms instead of just saying “make it look centered.”
If your project also includes sewn finishing details on garments or display fabric, it helps to understand adjacent construction basics too. A practical example is this guide on how to sew on trim, which shows how small finishing choices change the final look and consistency of a textile product.
Table of Contents
- Why Embroidery Placement Is Key to a Professional Look
- The Core Principles of Great Embroidery Placement
- Standard Placements for Shirts and Jackets
- Expert Placement on Hats and Accessories
- Decoding Sizing, Detail, and Stitch Constraints
- How to Review Your Digital Proof Like a Pro
- Answers to Common Embroidery Placement Questions
Why Embroidery Placement Is Key to a Professional Look
Most placement problems don't start on the machine. They start when someone says, “just put it on the chest,” and everyone involved pictures something slightly different.
That gap matters because embroidery is judged at a glance. Staff uniforms need to look consistent when a team stands together. Event shirts need branding that reads clearly in photos. Retail merch needs a logo that feels intentional on the body, not randomly dropped onto fabric. Placement is what ties the design to the garment.
A left chest logo is the classic example. It works because people expect it there, and because the placement usually balances the shirt front without overpowering it. Put the same logo too high and it crowds the collar. Put it too low and it can look like it's sliding toward the stomach. Neither error changes the logo itself, but both change how the garment is perceived.
A clean placement tells the viewer that the brand paid attention.
Clients often assume placement is only about aesthetics. In production, it also affects repeatability. If one shirt in a run is slightly off, the error may go unobserved. If twenty shirts in the same order vary from piece to piece, everyone notices. That's why placement standards exist. They help decorators hit the same visual position across multiple sizes and multiple garments.
The practical takeaway is simple. If you want embroidery to look expensive and trustworthy, don't treat placement as a last-minute detail. Treat it as part of the design itself.
The Core Principles of Great Embroidery Placement
Great placement starts before any measurements are discussed. The first question isn't “how many inches down?” It's “what visual job is this embroidery supposed to do?”
![]()
Placement follows the garment, not just the logo
A logo doesn't float in empty space. It sits on a placket, near a shoulder seam, above a pocket, across a zipper, or on a curved hat panel. Good placement uses those construction lines as guides. Bad placement ignores them.
The reason standard positions work so well is that they align with how garments are built and worn. The eye reads the collar, placket, shoulder seam, and center front first. Embroidery has to relate to those landmarks or it feels off, even when the stitching itself is clean.
Here are the principles I tell clients to use when they evaluate placement:
- Visual balance matters first: A logo should feel anchored to the garment. It shouldn't drift toward the sleeve, crash into the placket, or sink too low on the torso.
- Stable reference points beat soft edges: Seams and plackets are more reliable than neck openings or loose fabric edges.
- Body shape changes the right answer: Standard guides usually focus on adult polos and T-shirts, but they often don't address size-band and body-type variation in a systematic way, which leaves many buyers guessing on mixed-size orders, as noted in this industry discussion of placement gaps.
- Garment function should influence position: A corporate polo, a coaching jacket, and a retail hoodie don't all need the same placement logic.
Production limits shape what is possible
Clients don't need to know every machine setting, but they should understand hooping. Hooping is how the garment is secured for embroidery. If the area can't be hooped flat and stably, placement gets riskier. Seams, thick plackets, pockets, zippers, and structured edges all affect that.
The "can you put it here?" inquiry shifts from a design preference to a production challenge. Some positions are technically possible but produce weaker results. Others work only after adjusting size, simplifying detail, or moving the logo slightly.
Practical rule: The best placement is the one that looks centered on the finished garment and runs consistently in production.
A strong placement guide for embroidery doesn't just list common spots. It teaches you to think like a production manager. Ask where the garment folds, where it stretches, where the machine can hold it securely, and where the eye expects to see branding. If you do that, your approvals get faster and your finished pieces look better.
Standard Placements for Shirts and Jackets
A client approves a logo on a mockup, then the garments arrive and the chest mark looks too low on the women's polos, too close to the placket on the men's version, and lost on the jacket back. That usually starts with a vague request for “standard placement” instead of a placement tied to real garment features. Standard zones are useful, but they work best when you understand what they are anchoring to and why.
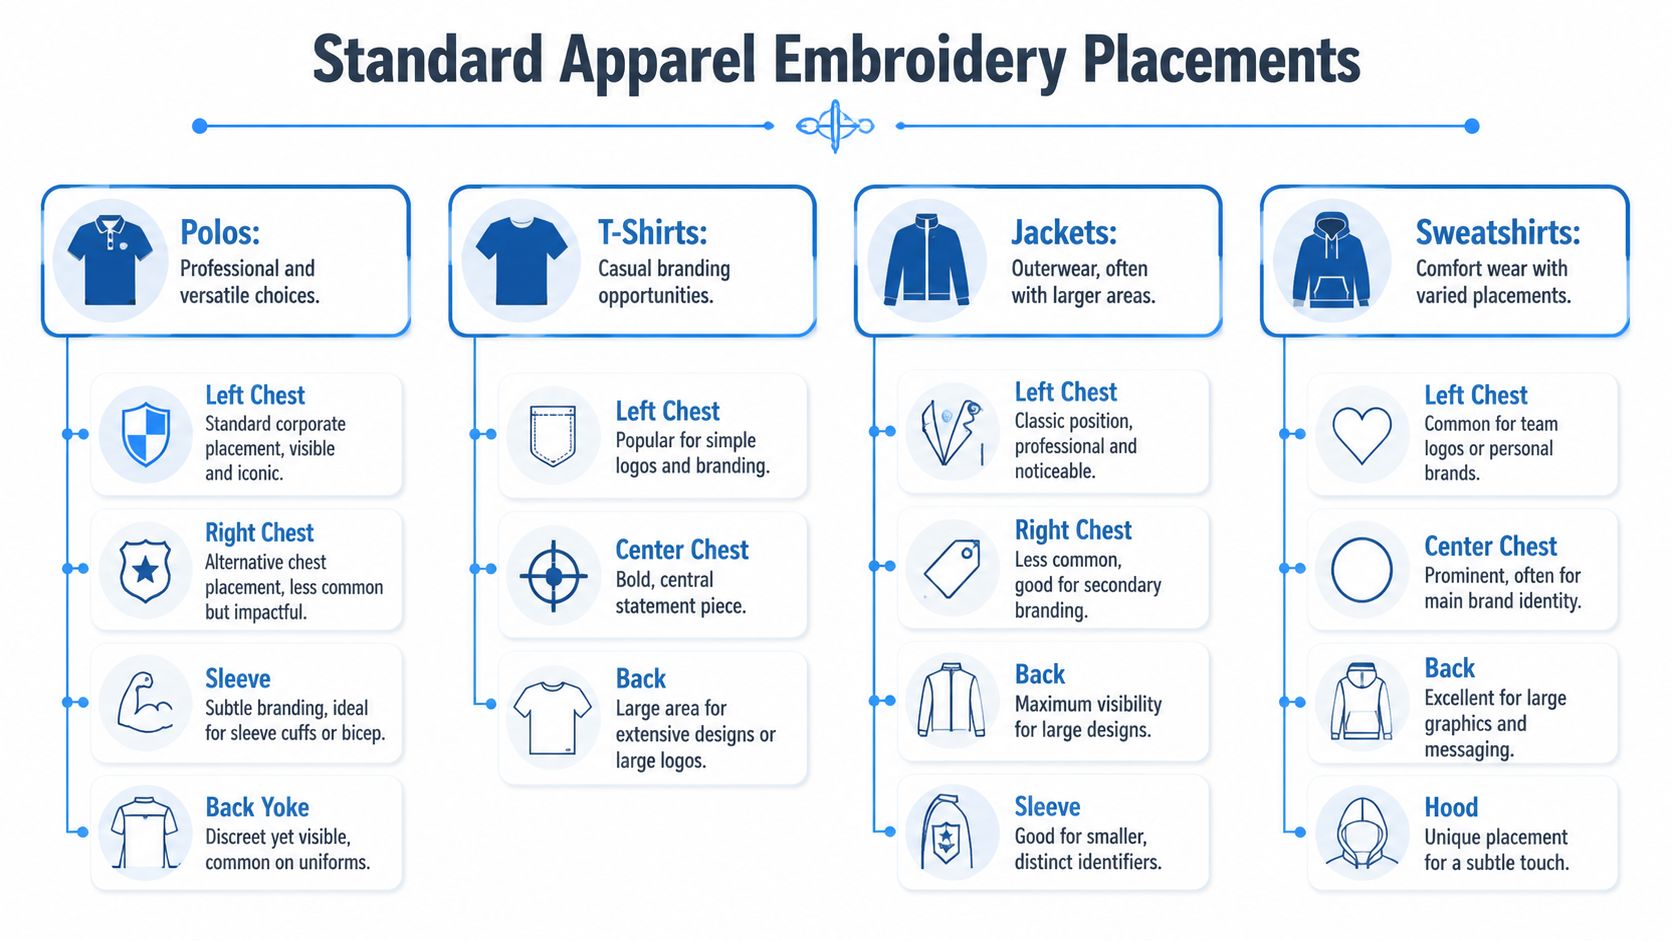
A quick reference table
The cleanest way to request placement is to name the zone, then name the anchor points. “Left chest, measured from center front and shoulder seam” gives production something repeatable. “Upper left” does not.
| Placement | Standard guidance | Why it works |
|---|---|---|
| Left chest | Adult left chest logos are commonly kept in a modest width range and positioned from the shoulder or collar seam and the centerline. Men's shirts often sit slightly lower than women's cuts, as outlined in this left chest placement standard. | It matches what people expect on polos, button-downs, quarter-zips, and light jackets. It also leaves space around the placket and collar. |
| Center chest | Center chest designs are typically measured down from the neckline, with the top of the design placed high enough to read clearly but low enough to avoid the collar area, based on this center front placement reference. | It creates a stronger visual statement than left chest and works well for casual apparel or event pieces. |
| Back panel | Full back placement is usually measured down from the collar so the design clears the neckline and sits in the main viewing area. Smaller garments often need that starting point adjusted upward. | It gives larger logos room to read at distance without fighting the front placket, pocket, or chest shaping. |
| Jacket back | Jacket backs usually need more clearance from the top edge than shirts do because collars, yokes, lining, and heavier construction change where the design looks centered on the finished garment. | It keeps the logo off bulky upper-back areas and helps the embroidery stay visible when the jacket is worn, not just laid flat. |
For polo-heavy orders, I always compare the placement against the actual garment style, not a generic template. Placket depth, collar roll, and fabric weight change where a logo looks right. This is easy to see when you review a range of bulk custom embroidered polos built on different shirt patterns.
A useful comparison point outside shirts is this structured guide to professional-quality tote stitching. The product is different, but the lesson carries over. Placement standards only work when they are tied to construction and viewing angle.
Later in the process, some buyers also like seeing placement demonstrated on-screen. This walkthrough can help.
How each placement behaves in real use
Left chest remains the safest choice for uniforms and corporate apparel. It reads cleanly, leaves the rest of the garment open, and holds up across mixed garment types better than any other position. The trade-off is size. Clients often try to fit extra text into a left chest logo, then wonder why it sews poorly or looks crowded.
Center chest gets attention fast. That makes it a good option for spirit wear, promotions, and retail-style pieces. It also exposes every weakness in the art. If the logo is too wide, too detailed, or too close to the neckline, the problem is obvious from across the room.
Back embroidery gives more area, but it changes the role of the garment. A large back design can be perfect for teams, events, and outerwear. On staff uniforms, it can feel too promotional unless the front also carries a small identifying mark. Clients get better results when they decide early whether the garment is meant to identify the wearer, advertise the brand, or do both.
Sleeves and specialty placements work best as secondary locations. A simple icon, short wordmark, or department mark can fit well there. Long text, dense logos, and placements too close to cuffs or seams are where avoidable production errors start.
For mixed orders, ask for placement approval by garment type. One left chest approval should not automatically cover polos, tees, fleece, and jackets. The standard zone may stay the same, but the exact position often needs a small adjustment to look correct on the finished piece.
Expert Placement on Hats and Accessories
Caps, beanies, bags, and similar items don't behave like shirts. The embroidery field is smaller, the shapes are more irregular, and the object itself changes how the logo is seen.
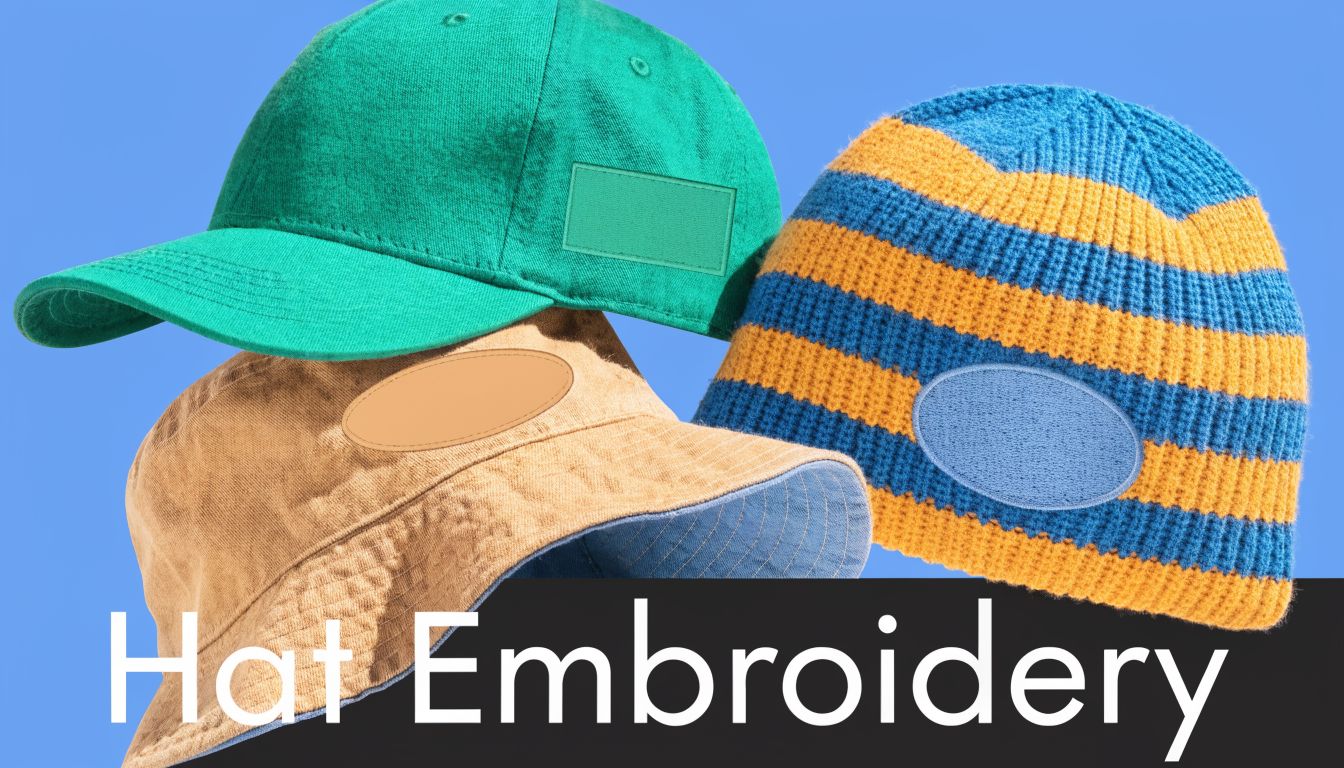
Why caps need a different mindset
The front of a cap is usually the hero position because it gives the logo the most immediate visibility. But that doesn't mean every logo belongs there at full detail. Structured caps hold shape better and generally support cleaner front embroidery. Softer caps and beanies often need simpler art because the surface moves more.
On hats, I look at three things first:
- Panel shape: A curved front panel changes how a wide logo reads.
- Seam interference: Center seams can split fine details or text.
- Viewing distance: Hat logos are often seen from farther away than chest logos.
If a brand wants side placement or back placement, that can work well for secondary marks, short words, or simple icons. It's usually not the place for busy art.
For buyers comparing hat styles, this collection of 6-panel hats is a useful reminder that structure affects not just fit, but how confidently the embroidery sits on the cap.
Bags and soft accessories
Tote bags, backpacks, and pouches create a different set of decisions. You're working with handles, pockets, folds, and seams instead of collars and plackets. The best placement is the area that stays visually open when the item is carried or filled.
A tote is a good example. A centered logo may look perfect on a flat mockup but disappear into a fold line when the bag is in use. If you want cleaner results on totes, this structured guide to professional-quality tote stitching is worth reviewing because it connects placement with how the bag is sewn and carried.
Beanies usually reward restraint. A short wordmark, symbol, or small cuff logo often looks cleaner than an ambitious design forced into a small area. Backpacks can handle more, but placement should avoid straps, zipper runs, and heavily padded sections.
Soft accessories should be approved in their filled or worn state, not just when laid flat.
That's the mistake many buyers make. They evaluate the product like a blank surface when it's really a shaped object in use.
Decoding Sizing, Detail, and Stitch Constraints
Embroidery isn't printing. A screen can display tiny outlines, gradients, and thin text without resistance. Thread can't.

Embroidery is built from thread, not pixels
The first thing clients should understand is that logo suitability and placement are linked. A detailed design might work on a larger back location but fail on a small left chest because the details collapse when scaled down.
Verified production guidance shows that standard color embroidery typically accommodates 1 to 6 thread colors per placement, with providers commonly offering approximately 15 standard colors that can be matched to corporate specifications using PMS charts. The same guidance notes that a medium garment typically accommodates a 6" × 4" design, and that left chest positioning usually carries baseline costs because it fits established workflows, while back and sleeve placements often add complexity, based on this professional embroidery production reference.
That matters because clients often try to solve a detail problem by shrinking the design. In embroidery, shrinking usually makes the problem worse.
Here's what tends to work well:
- Bold shapes: Clean fills and simple outlines hold up better than layered effects.
- Limited color changes: Fewer thread transitions usually produce a cleaner, faster-running design.
- Open lettering: Tight script and thin strokes are the first things to suffer when a logo is reduced.
Placement affects price and stitch quality
The placement itself can raise or lower production friction. Left chest is efficient because the industry has built stable workflows around it. Sleeve and back placements can require more setup attention, more stabilization, or more careful handling.
That doesn't mean alternative placements are a bad idea. It means they should be chosen on purpose.
A useful way to review your own logo is this:
- Look at the smallest intended placement. If it fails there, the art needs adjustment.
- Identify decorative details. Ask whether each detail is essential to brand recognition.
- Separate primary and secondary marks. A simplified icon may work better on hats and sleeves than the full lockup.
- Match the logo to the item. A jacket back can carry more than a beanie cuff.
If your order includes headwear, fit also matters because a logo can look oddly placed on a cap that sits too high or too shallow on the wearer's head. This guide on get a perfect fit for any hat is useful because fit and placement are connected more than most buyers realize.
For projects that mix garments, hats, and accessory embroidery, a broad service page for custom embroidery can also help buyers compare what types of items are practical for different logo treatments.
Shop-floor advice: If your logo depends on tiny features to be recognizable, simplify it for embroidery instead of forcing the machine to imitate a print file.
How to Review Your Digital Proof Like a Pro
A common production problem starts the same way. The mockup looks close enough, approval goes through, and the finished piece arrives with the logo sitting too high, too low, or too close to a seam. At that stage, the embroidery may be perfectly sewn and still feel wrong.
That is why proof review needs to be more than a quick visual check. A digital proof is the point where clients can catch placement decisions before they become thread, needle time, and spoiled garments. Good review habits reduce revisions, reduce remakes, and make it much easier for a shop to deliver exactly what you expected.
What to check before approval
Start by checking placement on the garment, not the logo artwork by itself. The main question is simple: does this design sit where a wearer would expect it to sit on the actual item?
Use this checklist:
- Confirm the placement reference point: Ask what the shop measured from. Shoulder seam, collar seam, placket, and panel edge are reliable anchors. A vague note like "centered on chest" leaves too much room for interpretation.
- Check the proof against the actual garment style: A polo, hoodie, soft shell, and women's cut shirt do not hang the same way. Placement that looks balanced on one body or pattern can look off on another.
- Review size handling: Ask whether the proof represents one sample size only or the full run. This matters on youth sizes, extended sizes, fitted cuts, and specialty garments.
- Check the design scale on the garment: A logo can be measured correctly and still look undersized or oversized once it is stitched on the item.
- Look for obstructions: Pockets, plackets, zippers, seam breaks, quilt lines, and jacket yokes can all interfere with how embroidery sits and sews.
Then review the art details.
- Spelling and legal names: Check every character, not just the obvious words.
- Color callouts: Confirm thread colors, especially if the brand standard uses close shades.
- Logo version: Make sure the proof shows the approved variation for that item, not a full lockup that should have been simplified for embroidery.
One small note can save a full rerun. "Please confirm measurement from shoulder seam" is a much better approval comment than "Looks good."
What experienced buyers ask for
Experienced buyers ask questions that pin down production intent. That helps the shop set up correctly, and it gives the client a clear record of what was approved.
| Ask this | Why it helps |
|---|---|
| What point was used to measure placement? | It confirms the shop used a stable garment feature, not a visual guess. |
| Is this proof showing one size or all sizes? | It tells you whether the layout has been reviewed across the full order. |
| Will small sizes use the same art size and placement? | It catches cases where the logo may overpower youth, petite, or fitted garments. |
| Was this proof built on the exact garment style we ordered? | It prevents approval based on a generic mockup that does not match the real cut or panel shape. |
| Are there any sewing constraints near this placement? | It surfaces issues with seams, pockets, zippers, or structured areas before production starts. |
The reason these questions matter is simple. Placement standards are not arbitrary shop habits. They exist because certain reference points stay consistent, certain areas wear better, and certain locations sew more cleanly than others. Once you understand that, the proof becomes easier to judge and easier to discuss with your decorator.
Approving a proof means approving location, scale, artwork version, and how that design will behave on the actual garment.
If something looks slightly off, stop and ask for a revision. In production, "slightly off" rarely gets better after stitching.
Answers to Common Embroidery Placement Questions
Can you embroider over a pocket, seam, or zipper
Sometimes, yes. Usually, it's not the best choice.
Pockets, seams, and zippers interrupt the sewing field and can distort the design. Even when the machine can reach the area, the result often looks less stable than embroidery placed on a clean panel. If the logo must sit near one of those features, it's often better to shift the placement slightly than to insist on an exact visual target.
How much does placement change between sizes
The safest method is to measure from a stable garment feature, not from a loose opening. Industry guidance places left chest designs 6 to 9 inches down from the left shoulder seam and 4 to 6 inches to the right of the center placket, because the shoulder seam stays more consistent across XS through XXL than the neckline does, according to this left chest measurement method.
That doesn't mean every size gets the exact same visual treatment. It means the reference point stays reliable.
Can one large back design stay the same on every shirt size
It can, but it shouldn't automatically. A design that feels balanced on a larger shirt can overpower a smaller one. The smarter approach is to review the size relationship, not just the raw art size.
What's the best default placement for a business logo
For most corporate programs, left chest is still the strongest default. It's familiar, readable, and appropriate on polos, jackets, and many uniform garments. If the brand wants more visibility, pair it with a back logo or a sleeve detail instead of forcing the chest logo larger than it should be.
What should I send with my order
Send the logo file, the exact garment style, the intended placement name, and any measurement preference you have. If you have mixed men's, women's, youth, or specialty fits in the same order, say that upfront. That single note prevents a lot of avoidable revisions.
If you want help turning artwork into clean, production-ready apparel, Dirt Cheap Product, Inc. can help you sort out logo size, placement, proofing, and garment selection before the order goes into production. That's the easiest way to avoid expensive guesswork and get embroidery that looks consistent across polos, jackets, hats, bags, and team apparel.