
You're probably here because the shirt idea is already real.
Maybe it's staff uniforms for a new location, event shirts for a fundraiser, merch for a brand launch, or a short run of samples before you commit to a bigger order. The design may already be done. Or maybe you've only got a logo file, a deadline, and a rough budget.
That's usually where shirt printing goes right or wrong. Not at the press. Earlier. The biggest mistake new buyers make is choosing a print method first and asking questions later. The better approach is to decide what outcome you need, then pick the method that gets you there with the least waste, least risk, and the right finish for the job.
Table of Contents
- Choosing Your Method Before You Print
- Preparing Your Artwork for a Flawless Print
- A Guide to Common T-Shirt Printing Methods
- Troubleshooting Common Issues and Shirt Care
- When to Hire a Professional Printing Service
Choosing Your Method Before You Print
A business owner ordering shirts usually asks the wrong first question. The first question is not which machine to use. It is what result the shirts need to deliver at the cost that makes sense for the order.
A common example makes the choice clearer. If you need 50 shirts for a one-time event with a 2-color logo, screen printing usually gives you the best unit cost and a clean, repeatable result. If you need 10 shirts for a new-hire welcome kit with a full-color photo or detailed artwork, DTG often wins because you avoid screen setup, even though the cost per shirt is higher.
That is the framework I use in a shop. Judge the job by three drivers first: quantity, quality target, and budget. Then check the fabric and the artwork detail before you approve production.
Start with the outcome, not the machine
A shirt order gets easier to price and easier to print when you answer four questions up front.
How many pieces are you ordering? Is the design a simple logo or full-color art? What garment are you printing on? Are you trying to keep startup cost low, lower the price per shirt, or get the best print feel and appearance?
Those choices affect the whole job, from method selection to proofing and placement, which is why VistaPrint's guide to printing a T-shirt puts the print method decision early in the process.
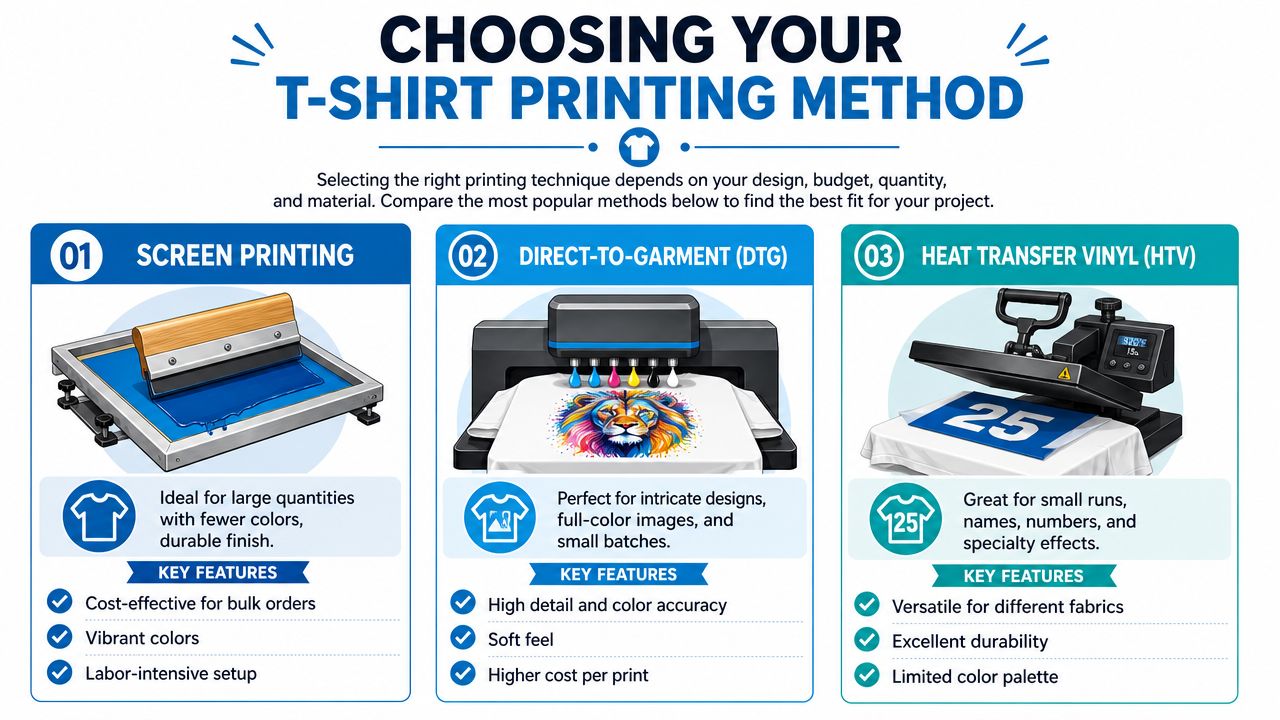
Use these shop-floor rules to narrow it down fast:
- Choose screen printing if you have a larger run, simple art, and a logo that needs solid color and consistent repeatability. Setup costs are higher, but they spread out well over volume.
- Choose DTG if the run is small and the artwork is detailed or photographic. You pay more per shirt, but you skip the screen setup that makes short runs expensive.
- Choose DTF if you need detailed graphics on mixed garment types or want transfer flexibility for short to mid-size orders. It can be a practical middle ground when cotton, blends, and different shirt colors are all in play.
- Choose HTV for names, numbers, one-offs, and simple personalization. It works well for team jerseys, staff names, and small internal orders, but it is not usually the first choice for a large company rollout.
- Choose sublimation for polyester performance shirts when you want the print to become part of the fabric. It is excellent in the right use case and the wrong choice on the wrong shirt.
Businesses should also weigh reorders. A method that looks fine on 12 shirts may become a problem if you need 300 more next quarter and want the same logo color, placement, and hand feel. That is one reason many buyers review logo decoration method options before committing to blanks or equipment.
If your team is still testing concepts before production, creating unique t-shirt visuals with AI can help generate early design directions before you decide which printing method fits the final artwork.
Compare methods before you buy blanks or equipment
The method should match the order, not the other way around.
| Method | Best For | Cost Profile | Feel & Durability | Fabric Compatibility |
|---|---|---|---|---|
| Screen Printing | Larger runs, bold logos, team shirts, event orders | Higher setup cost, lower unit cost as quantity rises | Durable finish, strong color coverage | Common on cotton and many standard apparel blanks |
| DTG | Small runs, detailed art, full-color prints | Lower setup burden, higher per-shirt cost | Soft feel on suitable garments, strong detail | Works best when the garment matches the process |
| HTV | Names, numbers, one-offs, simple text, small batches | Low barrier for DIY and personalization | Durable when applied correctly, usually feels more layered | Works on many garments depending on the vinyl |
| DTF | Short to mid runs, detailed logos, mixed garments | Good for flexible transfer-based production | Good visual pop, durability depends on transfer and pressing quality | Broad fabric compatibility |
| Sublimation | Polyester performance shirts and compatible all-over applications | Specialized process for specific jobs | Print becomes part of the substrate on the right garment | Best on polyester-compatible items |
Here is the practical trade-off. DIY methods make sense when the order is small, the deadline is flexible, and a reprint will not hurt the budget or the brand. A professional shop makes more sense when color consistency, repeat orders, staff uniforms, or client-facing apparel matter enough that mistakes cost more than the print bill.
That is the key decision. Buy equipment or use a DIY method when you are solving a low-risk, low-quantity problem. Call a professional when the shirts need to hold up, match future orders, and represent your business without guesswork.
Preparing Your Artwork for a Flawless Print
Bad files waste more shirt jobs than bad machines do.
A clean print starts with clean artwork. If the file is fuzzy, undersized, poorly placed, or built without the garment in mind, the shirt will look amateur no matter which print method you pick.

Use artwork that matches the method
There are two common file types you'll deal with. Vector art and raster art.
Vector art is built from paths. Logos, text, simple icons, and clean shapes usually belong here. A vector file can scale up without turning soft or blocky, which makes it ideal for left-chest logos, back prints, and brand marks that may be reused across shirts, polos, hats, and signs.
Raster art is built from pixels. Photos, painted textures, distressed graphics, and complex illustrations usually live here. Raster can print beautifully, but only if the file starts large and clean. A tiny website JPEG is not production art. It may look acceptable on a phone screen, but it falls apart when someone tries to enlarge it for apparel.
If your team is still developing concepts, tools for creating unique t-shirt visuals with AI can help generate directions quickly, but those concepts still need cleanup before production. AI images often need sharper edges, simplified color handling, and file prep that matches the print method.
If a file has to be “fixed a little,” ask what that actually means. Minor cleanup is normal. Rebuilding bad art from scratch is a different job.
For ink behavior and finish, especially when you're thinking about soft-hand results on cotton, it also helps to understand water-based ink printing basics. The file and the ink choice affect each other.
Get size and placement right before production
Placement is where many first-time buyers guess. That's a mistake.
Industry guidance recommends designing on an 18" x 18" canvas so artwork translates well to the garment. A standard maximum front or back print area for adult shirts is about 12 x 16 inches, and a typical center-chest print starts about 1.5 to 3 inches below the collar, based on VistaPrint's T-shirt design guide.
Those dimensions matter because shirts aren't posters. A design that looks balanced on a laptop screen can sit too high, too low, or too small once it lands on fabric. Small logos can disappear on larger shirt sizes. Oversized art can wrap awkwardly into side seams or underarms.
A few common placement calls:
- Center chest: Good for fashion graphics, event shirts, and bold front branding.
- Left chest: Better for uniforms, staff apparel, and cleaner corporate branding.
- Full back: Useful when the front needs to stay clean but you still want impact.
- Name plus logo layouts: Common in teams, service businesses, and field uniforms.
A simple file checklist before you send artwork
Before you submit art to a shop or start cutting vinyl at home, check these items:
- File type: Use vector for logos and text when possible. Use high-quality raster only for artwork that needs it.
- Background: Send artwork with a transparent background if the design isn't meant to include a box around it.
- Text: Convert fonts to outlines if you're providing vector art, or confirm the shop has the font.
- Print size: Decide the intended print dimensions before approval. Don't leave it to guesswork.
- Placement: Confirm whether it's center chest, left chest, full front, or full back.
- Garment color: Dark shirts and light shirts can require different production choices.
- Final proof: Approve one version only. Multiple versions floating around create expensive mistakes.
The cleanest jobs happen when the art, garment, and method are locked together before anyone prints a single shirt.
A Guide to Common T-Shirt Printing Methods
The method changes the workflow, the feel of the print, and the kinds of mistakes you're likely to make.
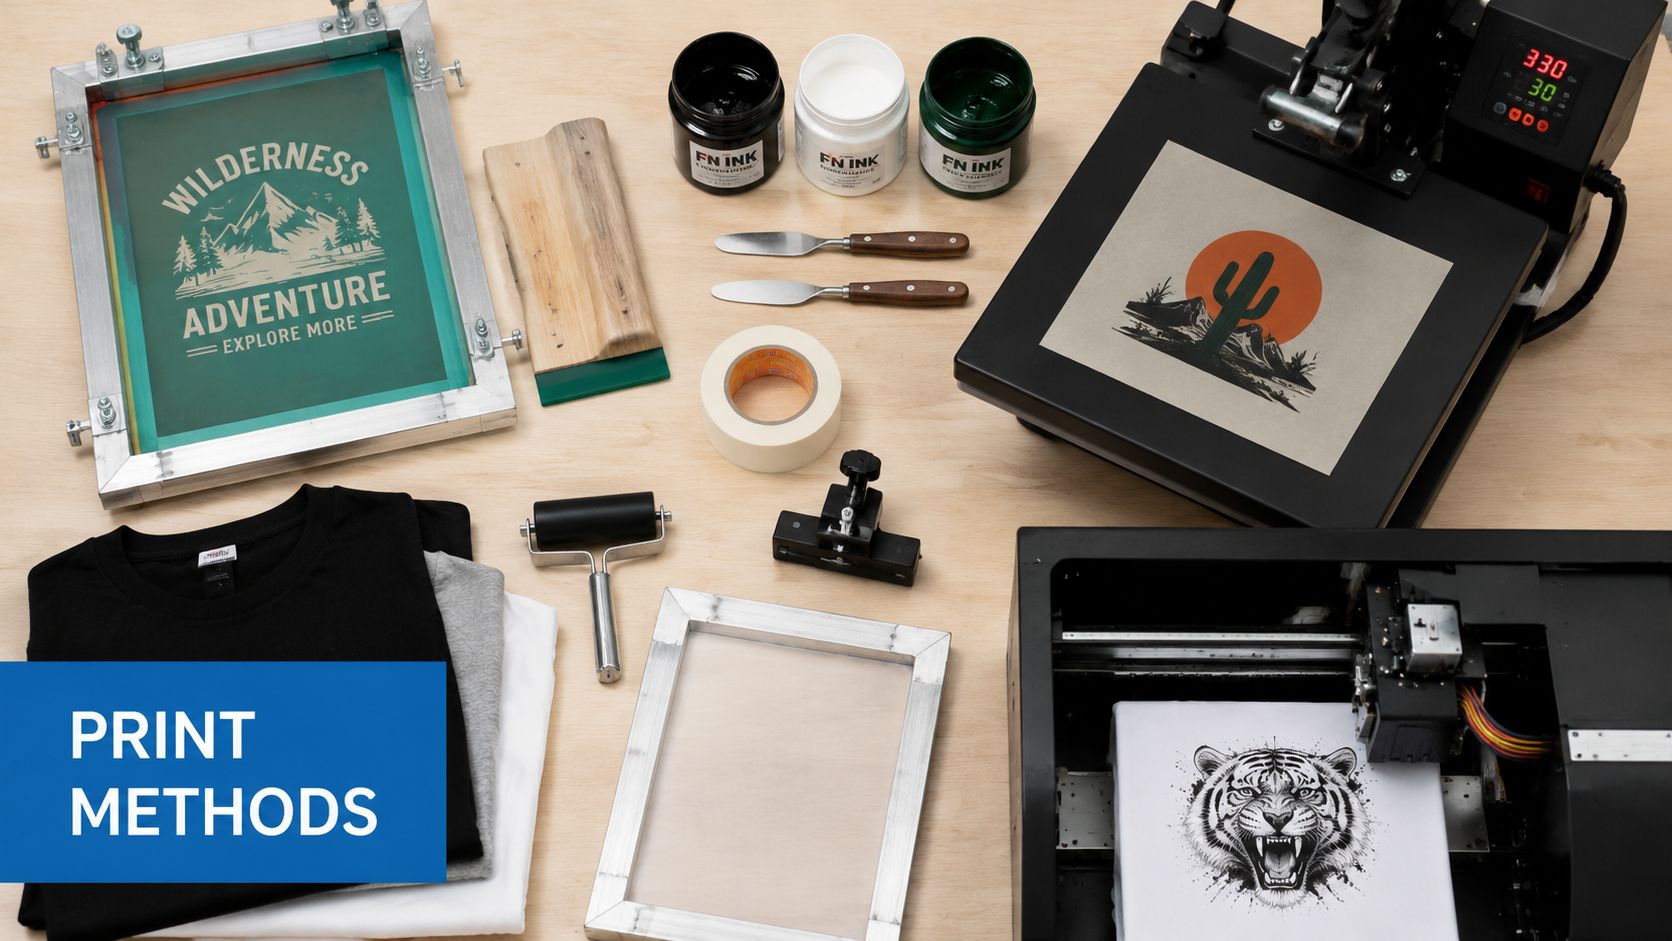
Screen printing
Screen printing is still the workhorse for straightforward bulk apparel. Ink is pushed through a prepared screen and deposited onto the shirt in the shape of the artwork. Each color usually needs its own setup, so this method rewards simpler color builds and larger quantities.
It's a strong fit for event shirts, staff uniforms, school programs, and merch with repeatable graphics. If a business wants a bold logo on many garments, this is often the first method worth pricing.
What works well:
- Bold artwork: Clean logos, strong shapes, readable text.
- Repeat orders: Once artwork is standardized, reorders get easier.
- Consistent branding: Good for matching one approved look across a team.
What doesn't:
- Constant design changes: Frequent revisions slow everything down.
- Tiny mixed-detail gradients: Some artwork is better suited to digital methods.
- Low-quantity experiments: Setup effort can outweigh the value.
Heat Transfer Vinyl
HTV is one of the most approachable DIY methods. You cut the design from colored vinyl, weed away the excess, place it on the shirt, and press it with heat.
It's practical for names, numbers, simple logos, and short-run internal shirts. It's also common when a business needs a few personalized pieces, such as one manager shirt, a sample, or individual player names.
For home or small-batch heat-transfer work, process control matters more than people think. The shirt should be pre-washed and ironed flat, the transfer must match the garment type, and pressing is typically done with a hot iron or heat press using method-specific dwell times such as 10–15 seconds per section for HTV, as outlined in Printify's guide to printing T-shirts at home.
Common HTV mistakes:
- Sliding the iron or press contact point: That causes wrinkling or shifts the design.
- Ignoring peel instructions: Hot-peel and cold-peel films behave differently.
- Skipping prep: Unwashed or wrinkled shirts reduce adhesion.
HTV is forgiving on simple jobs, but it punishes sloppy prep fast.
Direct-to-Garment
DTG prints directly onto the garment, much like an inkjet printer works on paper. It's popular for detailed art, gradients, and full-color images that would be awkward to build as multiple screens.
If you need a handful of shirts with complex artwork, DTG is often a sensible option. It's especially useful for test runs, artist merch, and designs with many colors that don't justify heavier setup.
What buyers usually like:
- Detail: Good for illustrations and photo-like art.
- Small batches: Easier for low-volume orders.
- Softer feel on suitable garments: Often preferred over thicker transfer-like finishes.
What to watch:
- Garment sensitivity: Shirt choice matters.
- Expectations on dark garments: Results depend on setup and file quality.
- Not every logo needs it: A simple one-color brand mark may be overkill here.
A broader look at how printers handle fabric decoration across different materials is useful if you're comparing processes beyond shirts. This overview on how to print on fabric with KAIYI SILK is helpful for understanding how substrate changes the method.
Direct-to-Film
DTF prints the artwork onto a transfer film, then applies it to the shirt with adhesive powder and heat. In practice, it gives shops flexibility. The transfer can be prepared, stored, and applied to different garments later.
For business customers, DTF often makes sense when a logo needs to go on mixed apparel types or when the art is detailed but the order structure doesn't fit screen printing cleanly.
Use cases that fit:
- Mixed garments: T-shirts, hoodies, bags, and other items with one graphic system.
- Short to mid runs: Especially when art has more detail.
- Fast logo application: Once transfers are ready, production can move efficiently.
Trade-offs:
- Hand feel varies: Some buyers prefer the softer feel of other methods.
- Pressing discipline matters: Time, heat, and pressure need to be right.
- Not every transfer is equal: Material quality shows up quickly in the finished piece.
If you're comparing this method specifically, a focused read on what direct-to-film printing is helps clarify where it fits.
Here's a visual walkthrough if you want to see different shirt printing approaches in action before deciding which path fits your job.
Sublimation
Sublimation is different from laying ink on top of the garment. On the right polyester-compatible item, the result becomes part of the material rather than sitting like a surface print.
This is the method people often ask about for performance wear, athletic tops, and bright all-over looks. But it only works well when the garment and coating are right for it. This is not the method to force onto any random cotton tee.
Best use cases:
- Polyester performance apparel
- Sportswear and lightweight synthetic garments
- Designs where you want a print that feels less like a patch on top
Poor use cases:
- Standard cotton tees
- Jobs where the wrong blank has already been purchased
- Projects where the buyer assumes every shirt can sublimate
Troubleshooting Common Issues and Shirt Care
The first failed shirt usually teaches the lesson people remember.
What usually goes wrong
If vinyl starts peeling, the usual causes are poor surface prep, uneven pressure, wrong peel timing, or not enough heat contact. If you used an iron, sliding it during pressing can also cause edge lift. Re-pressing may help in some cases, but prevention matters more.
If a print looks crooked, don't blame the machine first. Most often, placement was eyeballed instead of measured from a consistent point on the shirt. Once the design is pressed or printed off-center, there's no real fix.
If colors look weak or the design lacks punch, the art file may be the issue. Small web graphics and low-quality exports often look acceptable on screen and disappointing on fabric.
A shirt print usually fails at one of three points: bad art, bad placement, or bad process control.
If a screen print cracks early or a transfer feels rough and unreliable, check whether the garment, method, and use case matched in the first place. Work shirts, gym shirts, promo giveaways, and retail merch don't all need the same finish.
How to wash printed shirts so they last
Care instructions aren't glamorous, but they protect the job.
Use these rules for most decorated shirts:
- Wash inside out: This reduces abrasion on the printed surface.
- Use cold water: Lower heat is gentler on prints and adhesives.
- Skip aggressive drying: High dryer heat shortens the life of many decorations.
- Avoid harsh treatment: Rough wash cycles and overpacked loads wear prints faster.
- Store folded or hung clean: Dirt and repeated heat exposure do more damage than people expect.
For business apparel, include care guidance when you hand shirts to staff. A well-printed garment can still look tired if everyone launders it like a shop rag.
When to Hire a Professional Printing Service
A lot of bad shirt orders start the same way. A company needs 75 staff shirts for a trade show, buys a small press to save money, and assumes the hard part is just putting the logo on the chest. Then the first few shirts run late, placement starts drifting, colors look different from one box to the next, and someone is still pressing shirts the night before the event.
DIY works best when the order is small, the risk is low, and you can afford a few mistakes. Professional printing makes more sense when consistency, deadlines, and repeatability matter more than squeezing out the lowest possible upfront cost.
DIY makes sense in some cases
Keep the job in-house if you are testing an idea, making a single sample, or adding simple names and numbers to a short run. Heat transfer vinyl and basic transfers can be fine for internal use, especially if no one expects a retail finish.
Typical DIY-friendly jobs include:
- One-off samples: Checking logo size, placement, or general concept before ordering.
- Simple personalization: Names, departments, or short-run internal identifiers.
- Very small internal batches: Shirts for a quick team need where perfect consistency is not the priority.
- Training and experimentation: Learning how materials, pressure, and placement behave before using a larger budget.
The trade-off is labor. DIY often looks cheap on paper and expensive in practice once you count blank spoilage, setup time, staff hours, and reprints.
Call a pro when the result has to hold up under scrutiny
A professional shop earns its keep when shirts are customer-facing, employee-facing, or tied to a deadline you cannot miss. At that point, the question is not just "Can this image go on a shirt?" It's about whether the job needs to look the same on every garment, survive repeated washing, and arrive packed correctly.
Bring in a professional printer for jobs like these:
- Event apparel: You need the full order delivered on time, sorted correctly, and printed consistently.
- Uniform programs: Staff at multiple locations need the same logo size, placement, and color from run to run.
- Retail merch: Buyers will judge print feel, sharpness, and durability like any other product they pay for.
- Performance or specialty garments: Polyester, blends, moisture-wicking shirts, and unusual placements leave less room for error.
- Brand-controlled graphics: Logos with strict color expectations or approval requirements need proofing and process control.
As noted earlier, industry analysts at Grand View Research project strong growth in custom T-shirt printing. That tracks with what print shops see every day. More companies are ordering decorated apparel for retail, staffing, promotions, and events, and those jobs usually need reliable production rather than trial-and-error output.
Once a shirt represents the company in public, print consistency becomes part of the brand.
If you want a broader outside reference on fabric decoration methods before choosing a vendor, this complete guide to textile printing is a useful read.
What a professional shop handles for you
A good shop does more than run ink through a machine. It reduces expensive mistakes before production starts and controls variables during the run.
That usually includes:
- Method selection: Choosing screen printing, DTF, sublimation, embroidery, or another process based on garment, artwork, quantity, and budget.
- Artwork review: Catching low-resolution files, thin lines, bad transparencies, and color issues before they become wasted shirts.
- Proof approval: Confirming print size, location, garment choice, and decoration details before the order goes live.
- Production control: Managing setup, curing, pressure, temperature, and finishing so the first shirt and the last shirt match.
- Repeat-order consistency: Keeping prior specs on file so reorders do not shift in placement or appearance.
For companies that need apparel decoration across methods, Dirt Cheap Product, Inc. handles services such as screen printing, DTF, sublimation, embroidery, and patches for branded garments and promotional programs.