
You've got a stack of fleece jackets, blankets, or pullovers waiting for a logo, and the artwork looks perfect on the screen. Then the first sample comes off the machine with soft stitches buried in the nap, a crushed hoop mark, or lettering that's difficult to read. Embroidering on fleece isn't standard garment embroidery with a warmer fabric. The brushed pile, stretch, and loft demand a separate decoration discipline built around controlling where the thread sits.
The reliable process starts before the machine runs. Fabric inspection, gentle hooping, backing on the reverse, a water-soluble topper on the face, fleece-aware digitizing, controlled machine settings, and careful finishing all work together. Miss one part, and the fabric can swallow otherwise good embroidery.
Table of Contents
- Why Embroidering on Fleece Works Differently
- Preparing Fleece and Hooping Without Damage
- Choosing Stabilizers and Backing for Fleece
- Digitizing and Adapting Designs for Fleece
- Setting Up Machine, Needle, Thread, and Speed
- Trimming, Topper Removal, and Finishing
- Troubleshooting Common Fleece Embroidery Problems
Why Embroidering on Fleece Works Differently
A logo can look crisp on the screen yet disappear into the fabric on the first fleece sample. The brushed, napped surface leaves raised fibers around the stitches, covering lower thread layers and softening fine details. Embroidering on fleece isn't standard garment embroidery with a warmer fabric. Every decision must control the pile while keeping the design visible and the garment presentable.
A dependable setup supports the embroidery from both sides. Backing beneath the fleece helps stabilize the knit, while a water-soluble topper on the face holds stitches above the nap. Sulky's fleece embroidery guidance explains this pile-control approach and why direct hooping can damage or flatten the surface.
Two fleece categories appear often in apparel decoration. Anti-pill fleece generally has a more controlled face, while polar fleece may have loftier, less uniform fibers. The label is only a starting point. Fiber content, fabric weight, stretch, and nap direction determine how much support the design needs. High-loft fleece usually requires stronger pile control. Flatter fleece may handle a lighter setup for a simple motif.
Practical rule: Choose the design and support system for the pile you can see, not the file you can preview on a flat monitor.
Standard garment settings can produce buried thread, blurred small lettering, and dense areas that stack instead of forming a clean field. Embroidery Legacy's fleece reference recommends bold, simple shapes and larger motifs, along with slower stitching and careful hoop control for thicker fleece.
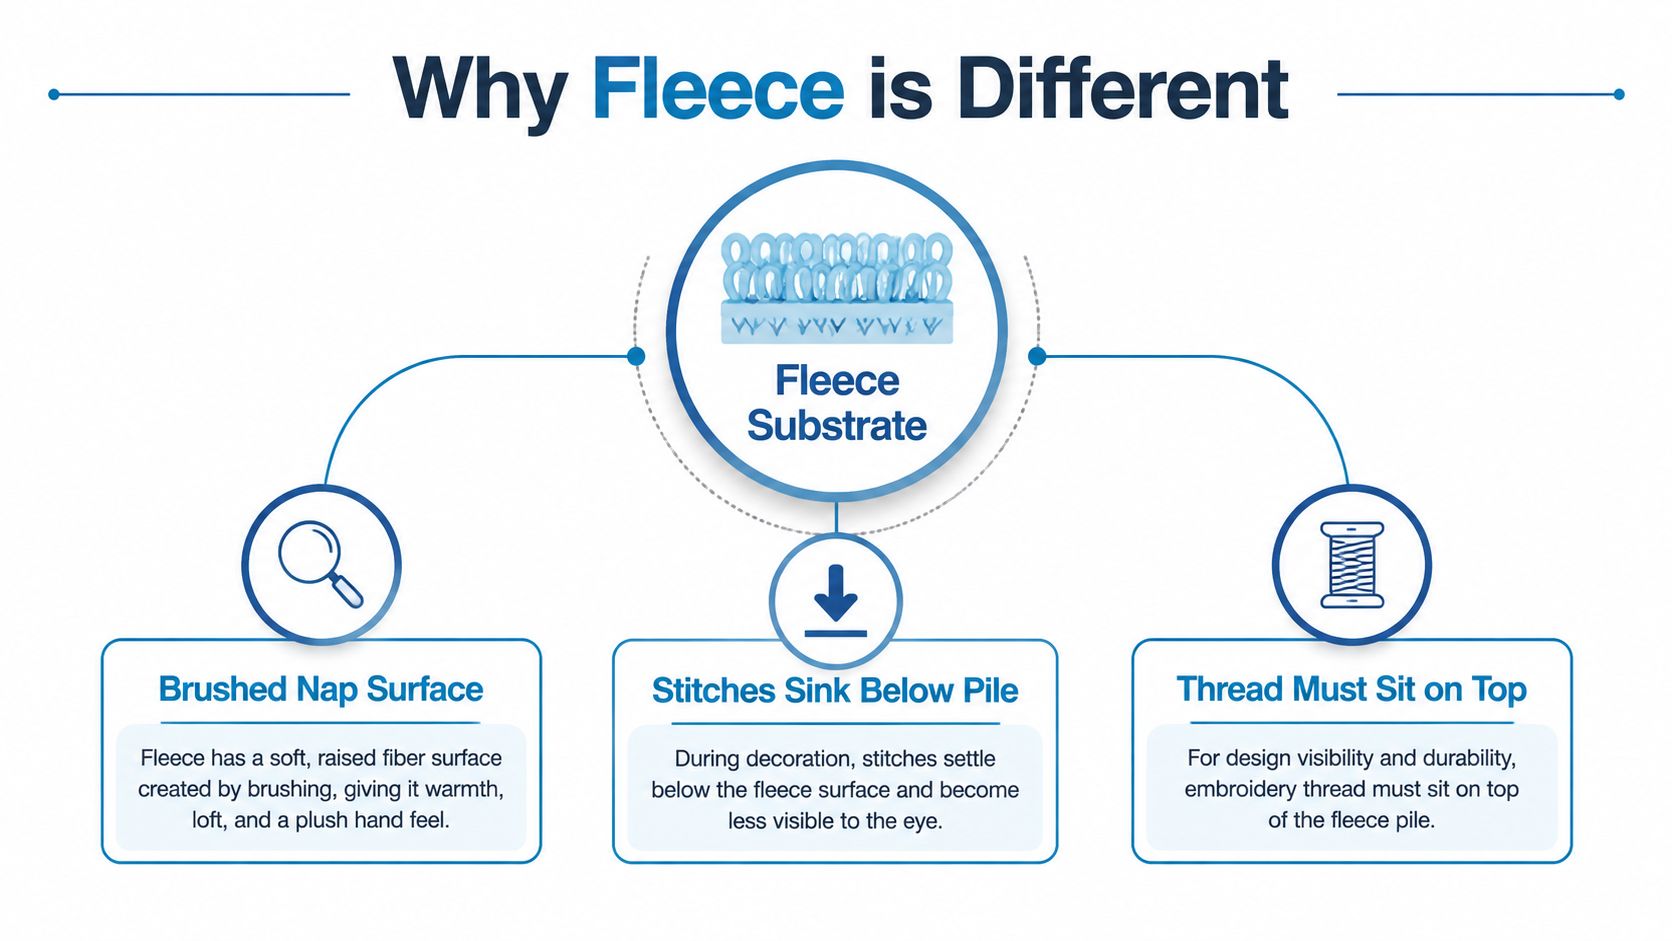
Treat the job as one connected production system. Inspect the pile, preserve its loft, stabilize without stretching, adjust the file for visibility, and test the complete setup on matching fleece. The finished logo should read clearly, sit cleanly above the surface, and look ready for a customer or event order.
Preparing Fleece and Hooping Without Damage
A clean result starts before the garment reaches the machine. Inspect the fleece for stretch, uneven nap, seams, zippers, and bulky construction before applying backing. Rub your hand across the face in both directions. If the color or texture shifts, mark the nap direction and load every garment consistently. Pile direction can change how the logo reflects light, even when the stitching is identical.
Pre-wash the item if it will be washed before delivery or if residual finishing chemicals may affect handling. Follow the care label, dry it without excessive heat, and press only where necessary. Keep steam and direct heat off the face. Flattened nap can leave a visible patch that embroidery will not conceal.
Keep the hoop from crushing the pile
Fleece needs a controlled hold, not drum-tight tension. Over-tightening the outer ring compresses the pile and can stretch the knit, leaving a ring, flattened rectangle, or puckering around the design. For fleece, hoop the stabilizer, apply temporary spray adhesive, and place the garment over it rather than clamping the fleece itself. This floating setup also reduces hoop burns.
Set enough tension to keep the fabric flat while preserving the loft. A magnetic hoop can reduce pressure on the face. Floating is practical for jackets, blankets, and garments with seams that do not sit naturally inside a round hoop. Cap frames suit fleece only when the item and placement fit the frame. Check needle access before starting, and make sure garment bulk will not drag against the machine.

Align placement before the first stitch
For a chest logo, find the garment's true center and account for the zipper, pocket, or side seam. Sleeve decoration needs a stable reference line because the sleeve can rotate during hooping. On full-zip garments, float the item with the zipper outside the working area whenever possible.
Mark vertical and horizontal center lines with a water-soluble ruler, removable marker, or paper template. Repeat orders benefit from a physical placement template. Compare it with each garment before stitching, especially when nap direction varies.
Blankets and plush fabrics can behave differently from apparel fleece. Reviewing materials for personalized photo blankets helps distinguish fleece from other blanket surfaces before decoration. A matching test piece remains the final check for placement, compression, and pile control.
Choosing Stabilizers and Backing for Fleece
Fleece needs support that controls its pile without leaving the decoration stiff. The backing holds the fabric while stitches build, and the topper keeps thread from sinking into the napped face. For branded fleece apparel, start with a mesh cutaway stabilizer. It remains inside the garment, supporting the design after hooping, during wear, and through washing. A lightweight water-soluble topper can sit on the front when the nap is high or brushed.
Cutaway is the safer choice for logos that pull in several directions. Tear-away may suit a simple, light design on stable midweight fleece, but removal can leave the embroidery with less support. Embroidery Library's stabilizer guide places fleece among fabrics that generally use cutaway backing, while describing tear-away as suitable only in some simple-design situations.
Wash-away backing has a specific use. Choose it when the reverse must stay soft and unobstructed, such as on a blanket or scarf with visible front and back surfaces. The design must remain light enough to hold its shape after the soluble support disappears. For demanding apparel logos, removing all structural backing usually gives up too much stability.
Match support to the fleece
| Fleece Weight | Recommended Stabilizer | Topper Needed | Density Limit |
|---|---|---|---|
| Lightweight fleece | Lightweight to medium mesh cutaway | Usually yes | Light, open designs |
| Midweight fleece | Medium mesh cutaway | Yes for raised or brushed nap | Low to moderate |
| Heavy or lofty fleece | Stronger mesh cutaway | Yes, sometimes with two layers | Moderate, with simplified detail |
Use the table as a starting point, not a final setting. Loft varies within the same garment style, so a dense logo may need stronger backing than the fabric weight suggests. Two layers of water-soluble stabilizer can help when the back will be visible, but test first. Extra soluble material can change the hand and make removal slower. A suitable backing should also match the design and garment, as outlined in this embroidery backing and stabilizer guide.
Slippery anti-pill fleece may shift while floated. A light, even mist of temporary adhesive on the stabilizer can hold it in place. Do not saturate the garment. Let the adhesive settle before stitching, and keep overspray away from the needle path because buildup increases drag and can cause thread breaks.
Run a test on the actual fleece whenever possible. Check whether the pile is controlled, the reverse feels acceptable, and the logo remains stable after the backing is trimmed. That test is the difference between a support choice that merely stitches and one that produces a brand-ready garment.
Digitizing and Adapting Designs for Fleece
A flat-knit embroidery file rarely transfers cleanly to fleece. Its pile can bury fine elements, while excess stitching compresses the surface and leaves a fuzzy, overworked result. Adapt the artwork for pile control: simplify shapes, open the spacing, strengthen the underlay, and give key details enough stitch presence to remain visible.
For fill areas, start around 70 to 80% of standard flat-knit density. The lower coverage leaves room between stitches instead of stacking thread into a hard patch. Treat that as a test setting, not a universal rule. Lofty polar fleece and flatter anti-pill fleece can respond very differently, even within the same garment category.
Build the file around visibility
A double lattice underlay, or a single run paired with an edge walk, can anchor larger elements without burying the nap. Pull compensation around 0.3 to 0.5 mm helps prevent edges from drawing inward. Keep lettering comfortably large, avoid sub-8 mm text, and preserve line weights above 2 mm where possible. These values belong in the sampling process, since pile height and stitch behavior will determine the final result.
Break broad satin columns into fill areas with short satin sections when a continuous column becomes too dense or unstable. Bold outlines, appliqué, and chunky lettering generally read more clearly than micro-detail. Fine thread is a poor choice for delicate elements because fleece can absorb it, as noted in Embroidery Legacy's fleece instructions.
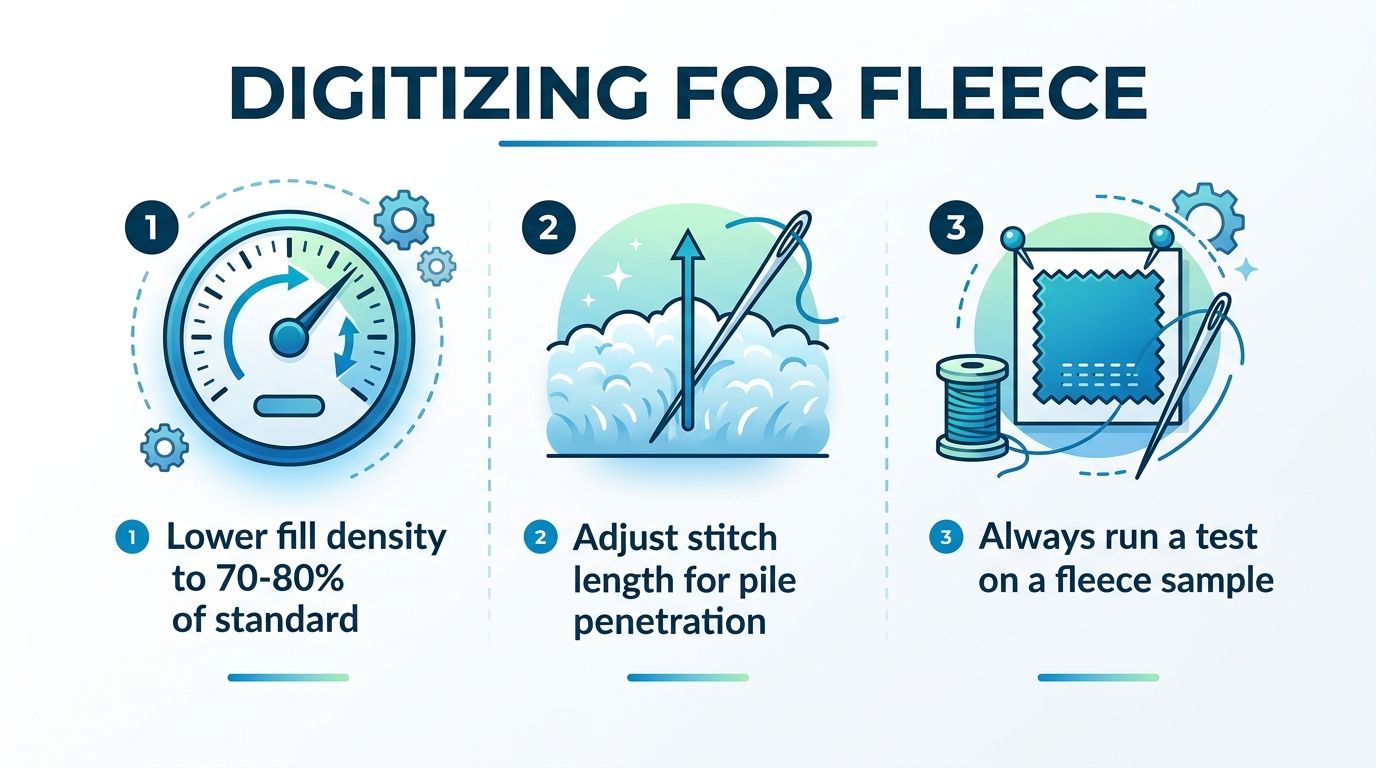
Stitch the revised file on a scrap from the same fleece run before production. Inspect the smallest lettering, outer edges, fill coverage, and how color changes sit above the pile. For ceremonial or event garments, teams can also order from Stoles.com embroidery experts when artwork requires professional adaptation.
A fleece-ready handoff should record the stabilizer, topper, needle, thread, intended speed, design orientation, and test result. Include a visual sample showing approved placement, not only the embroidery file. For further artwork preparation, use this guide to digitizing logos for embroidery.
Setting Up Machine, Needle, Thread, and Speed
Fleece needs a controlled machine setup because its nap can hide stitches, resist smooth needle penetration, and shift under the foot. For stretchy fleece, use a 75/11 or 80/12 ballpoint needle. Its rounded point can pass between knit loops with less risk of cutting fibers. A 75/11 sharp needle can also suit a firmer or tightly constructed fleece, so test both when the surface does not respond predictably.
Choose a 40-weight polyester thread for branded garments that will face handling and washing. Match the bobbin thread when the reverse may show. Rayon provides more sheen, but polyester is generally easier to specify for production apparel. Replace a worn or damaged needle immediately. A small snag can grow into a registration problem as the fleece drags during stitching.
Use a written setup, not a guess
For thicker fleece and larger designs, begin around 600 to 700 stitches per minute. Start at the lower end for bulky garments, dense sections, or an unfamiliar fleece. Inspect the first sample for heat, distortion, uneven thread delivery, and any loss of definition as the nap rises around the stitches.
| Setting | Recommended Value | Notes |
|---|---|---|
| Needle | 75/11 or 80/12 ballpoint | Test a 75/11 sharp option when the fleece surface calls for it |
| Thread | 40-weight polyester | Use a consistent thread system through the run |
| Machine speed | About 600 to 700 stitches per minute for thick fleece | Slow further if the fabric shifts or the design distorts |
| Stabilizer | Mesh cutaway | Increase support for stretch and demanding designs |
| Front support | Lightweight water-soluble topper | Remove after stitching without pulling the embroidery |
Balance bobbin and top tension so the design stays on the surface instead of sinking into the pile. If bobbin thread appears on the face, correct the imbalance before continuing. Set presser-foot pressure firmly enough to control the garment without crushing its nap. Check that the fabric travels freely and does not catch on seams, pockets, or zippers.
Record the needle, thread, stabilizer, topper, speed, and tension on the job ticket. Consistent settings matter more than a theoretical target, especially across fleece colors and garment styles. Keep approved thread references organized with your embroidery thread colors so substitutions do not introduce visible differences. A short test run remains the final authority: adjust for the actual fleece surface, then repeat the approved setup throughout production.
Trimming, Topper Removal, and Finishing
Finishing determines whether fleece embroidery looks retail-ready. Remove the water-soluble topper before trimming the backing. Lightly spritz it with distilled water and let it dissolve rather than pulling it away dry, because aggressive removal can lift stitches from the nap. Life Sew Savory's fleece tutorial describes trimming the soluble stabilizer close to the design and removing the remainder with water.
Use small, sharp curved scissors to clip jump threads close to the surface. Don't dig the tips into the fleece, and don't cut backing that's supporting the design. Once the loose material is gone, brush around the embroidery with a soft garment brush. The aim is to lift the surrounding nap so the stitched shapes remain distinct without brushing across the thread aggressively.
Restore the surface carefully
Never iron directly on the embroidery. If the garment needs pressing, place a thick terry towel underneath or use it as a pressing cloth, then work from the reverse at low heat according to the care label. The towel gives the pile room to recover instead of forcing the stitched face flat.
A brief, controlled steam treatment can help the surrounding fleece regain loft, but keep the steamer moving and avoid saturating the design. Let the garment dry flat if moisture was used during topper removal. Fold fleece inside-out and pack it in a clean polybag so the nap doesn't collect lint or develop pressure marks before delivery.
Inspect the finished piece under raking light. Angled light reveals loose jump threads, buried letters, uneven edges, and small areas where the fleece has been compressed. Check the front, reverse, placement, and overall hand before approving the garment for shipment.
Troubleshooting Common Fleece Embroidery Problems
Fleece defects usually come from a mismatch between the pile and the decoration setup. Start with the visible symptom, then change one variable at a time. Adjusting the file, needle, stabilizer, and tension together hides the cause and makes a repeatable fix difficult.
Start with the visible defect
Stitches sinking into the pile mean the thread lacks enough surface support, the design contains overly fine detail, or the stitch density does not suit the loft. Improve the water-soluble topper, simplify delicate elements, and review the underlay. A bold design with controlled density often reads more clearly than a detailed file carrying excess thread.
Hoop burn or crushed marks show that the fleece was compressed or tightened too aggressively. Float the garment on hooped backing, use a magnetic approach where appropriate, and keep the nap relaxed during setup. Once the pile has been crushed, pressing may not restore a clean brand-ready surface.
Puckering around the design can result from stretched fabric, weak backing, excessive density, or unbalanced tension. Remove the garment and check whether the fleece shifted or was pulled during placement. Gentle steam and a pressing mat may help a minor surface change. A permanent ring, deep distortion, or stretched logo usually calls for a replacement garment rather than a rescue attempt.
Registration drift often starts with inconsistent placement, shifting adhesive, garment bulk, or movement between the fleece and stabilizer. Recheck the center template, keep seams and zippers clear, and confirm that the backing remains flat. Stop a visibly misregistered sample instead of continuing the run. Correct the hooping method, then test again.
| Symptom | Likely Cause | Remedy |
|---|---|---|
| Buried or fuzzy stitches | Loft covers the thread | Add a topper, simplify detail, review underlay |
| Visible hoop ring | Excessive hoop pressure | Float the garment or reduce compression |
| Puckered perimeter | Stretch, density, or tension imbalance | Strengthen backing, reduce density, retest tension |
| Misaligned repeat garments | Inconsistent templates or shifting fabric | Re-mark placement and secure the stabilizer |
| Thread breaks or snags | Worn needle, adhesive buildup, or drag | Change the needle, reduce overspray, inspect the path |
Use the finished sample as the production reference. Record the file, backing, topper, needle, thread, and machine settings that produced the cleanest result, then keep that combination for the fleece run.
Mild compression can sometimes recover, but a deep hoop mark or distorted logo rarely becomes acceptable through pressing alone. Scrap the piece if the fabric face remains visibly crushed, the lettering has changed shape, or the embroidery no longer matches the approved sample.
Dirt Cheap Product, Inc. provides custom embroidery, screen printing, DTF, sublimation, and patches for branded fleece, outerwear, uniforms, event merchandise, and retail apparel. Upload your logo for responsive support, artwork proofs, and apparel options suited to your project, then visit Dirt Cheap Product, Inc. to start your order.