
It's Tuesday night, practice just ended, and you're the person holding the size list. A coach wants jackets before the first cold game, two parents have already changed a size by text, and someone sent a blurry logo from an old photo. You don't need more opinions about colors. You need a clear order that fits real people, arrives before they're supposed to wear it, and doesn't leave you with a box of named jackets for players who left.
That's the job with Custom Jackets for Teams. The simplest way to get it right is to slow down at three points, role, measurements, and roster lock, then move fast on proof and production.
Table of Contents
- Match Each Jacket to the Wearer
- How to Place a Team Jacket Order
- Measure the Roster Before Decoration
- Pick Decoration That Lasts the Season
- Set Names Numbers and Order Quantity
- Build a Budget and a Wear Date
- Approve the Proof and Place the Order
Match Each Jacket to the Wearer
Start with the job each person does on game day. The mover needs heat to escape. The coach needs pockets and a tidy chest for a logo. The bench and the bleachers need warmth that can sit still. One jacket cannot do all three well.
The Two Tier Verdict
Buy in two tiers. Give people who move a lighter technical layer they can work in. Give supporters, letter winners, and low-activity staff a lifestyle or award jacket built for warmth and identity. Hold embroidered names until the roster locks; a jacket can be sized, approved, and produced while the name list stays open.
That split also protects the budget. Apparel accounted for 38.5% of North American licensed football merchandise revenue in 2025, according to the North America licensed football merchandise market report from Data Bridge Market Research. When apparel carries that much weight, the premium label is the wrong place to spend first. Fit for the job is the decision.
Read the Matrix Row by Row
A lightweight shell fits active staff and moving players in mild or wet weather. It should layer cleanly over a hoodie or uniform and stay breathable, so keep heat applied art small. A giant film across the back can turn a shell into a plastic sheet. If rain coverage is the first problem for movers, compare the shortlist with customizable rain jackets built for team use before heavier insulated styles.
A soft shell is the travel and coaching workhorse. It handles cool, changeable days, looks tidy in photos, and works over a light midlayer. It is structured enough for chest embroidery, yet still a poor place for a huge stiff graphic.
An insulated jacket suits cold benches and spectators. Buy it for low activity in cold weather, with room for a tee or thin layer only. A wool body, leather sleeve varsity jacket belongs with letters, mascots, and season identity. It is an award and keepsake, built to fit over a shirt.
A fleece team jacket covers everyday mild wear and frequent washing. Supporters reach for it often, which is why it works for the second tier. Keep jerseys and jackets as separate budget lines too: pricing affordable jerseys with JC Sports Houston is a different decision from choosing a technical shell versus a lifestyle jacket.
Team Jacket Styles by Role and Use
| Style | Who Wears It | Activity and Climate | Layering | Decoration Caution |
|---|---|---|---|---|
| Lightweight shell | Active staff and moving players | Wet or mild, high activity | Over hoodie or uniform | Keep heat applied art small so the shell still breathes |
| Soft shell | Coaches and travel staff | Cool variable weather, moderate activity | Light midlayer | Embroidery on structured panels; avoid huge films |
| Insulated jacket | Cold benches, spectators, fans | Cold, low activity | Tee or thin layer only | Embroidery and patches; thick films can crack |
| Wool and leather varsity | Letter winners and school identity | Cold sideline, low activity | Shirt, not pads | Chenille letters, sew on patches, chest embroidery |
| Fleece team jacket | Everyday wear and supporters | Mild cool, casual | Tee | Screen print, DTF, or small embroidery; expect more washing |
Assign one style per role before anyone debates logos or price. Write the role, the style, the base layer, and whether that group gets names now or after roster lock. If a line cannot be filled, quote that group later.
How to Place a Team Jacket Order
Run the order like a captain or office manager with one list and one decision maker. Don't let five people approve five different versions by text. Each step below closes a door behind you, so you don't reopen it during production.
The flow fits on one planning board, from freezing roles to submitting the order.

Steps One to Four
- Freeze roles and styles: Lock the two tier choices and write the first wear date at the top of the sheet. The slip is picking jackets before you know who wears them, which forces you to restart sizing later.
- Collect clean artwork: Get the logo as a vector file, AI, EPS, or SVG, plus PMS or hex colors. Mark placement now, left chest, full back, or sleeve. A JPG pulled from social media often can't be sewn or printed cleanly, and fixing it mid order eats your buffer.
- Choose a measurable blank: Pick a catalog jacket that publishes finished garment measurements, not only S to XXL names, in your school or brand colors. If the spec sheet won't tell you chest and sleeve length, you can't size the roster with confidence.
- Order undecorated samples: Get one sample per style and per size cluster, and have real wearers try them on over the layer they'll use. Skipping the sample to save a week is the classic trade that costs you three weeks in exchanges.
That sample step matters for full kits, not just outerwear. The same discipline shows up in soccer uniform guidance from Villarreal Houston Academy, where you confirm the garment on real players before you commit a whole squad to it.
Steps Five to Seven
- Approve a digital proof: Check color, stitch or print size, and placement at real size before production art is released. A chest logo that looks fine on a phone can land on a zipper or read too small across a back.
- Lock quantities after the roster deadline: Decide here whether names wait for a second pass. If you lock quantities while tryouts or transfers are still open, you're buying your leftovers in advance.
- Confirm delivery and pay: Use one ship to address, confirm payment, and set production against the wear date with a spare week. Booking a Friday delivery for a Saturday game leaves no room for a carrier delay or one wrong size.
Before you submit anything, watch how those decisions look as a finished order rather than a list on a page.
Done looks like this: a signed proof, a locked size sheet, and a delivery date that still has buffer after it.
If one of those three pieces is missing, don't release production. A short pause now is cheaper than reprinting a run you approved from memory.
Measure the Roster Before Decoration
Ignore S to XXL until the tape work is done. Labels change between brands, and two jackets both marked large can fit like different garments. Measurements travel across brands. Labels don't.
The Five Measurement Actions
First, collect chest, waist, hip, sleeve, and height for every wearer. Second, group similar bodies into clusters instead of sizing everyone up one step for safety. Third, map each cluster to the maker's finished garment measurements, including ease for the hoodie, uniform, or tee that'll go underneath.
Fourth, have a representative from each cluster try one sample per proposed size. Fifth, record the selected size, measured chest, layering allowance, and a yes from the wearer in a locked spreadsheet before any decoration starts. Once stitching begins, a size change isn't a swap anymore. It's a new jacket.
Sleeve length is where quiet mistakes hide, especially for tall players and anyone layering over pads or a hoodie. If your group needs a refresher on shoulder point to wrist technique, these jacket sleeve measurement tips explain the landmarks in plain terms you can copy into your roster sheet. Pair that with a custom apparel sizing guide for finished garment specs so the whole group reads body inches and garment inches the same way.
Aim for at least 90% first pass fit, with a small exchange reserve for outliers. That target is a planning benchmark from the measurement workflow, and a useful point of comparison is a military clothing study of 4,400 personnel that grouped measurements into 14 size categories and achieved good trouser fit for 92.52% of the population, described in the military anthropometric sizing study. Treat that result as proof that population specific sizing works, not as a guaranteed success rate for your jacket order.
Roster Measurements to Lock Before Production
| What to Record | How to Measure | Planning Rule |
|---|---|---|
| Chest | Fullest chest, arms down, over the base layer worn under the jacket | Match finished garment chest, not the S to XXL label |
| Waist | Natural waist, tape snug not tight | Use on shaped or cinched styles |
| Hip | Fullest hip | Needed on longer cuts and many women's specs |
| Sleeve | Shoulder point to wrist, elbow slightly bent | Add length for pads or a hoodie |
| Height | Without shoes | Flags petite and extra long bodies a chest size hides |
| Layering allowance | Note tee, uniform, or hoodie | Use the ease in the spec; do not guess |
| Approval | Wearer or coach signs the size | Lock the row before art is released |
Read the table with intent. The chest row drives most outerwear decisions, while sleeve and height catch the people a chest size hides. The approval row is what stops a parent from changing a size after decoration starts.
Three Failures to Block
- Measuring over a bulky coat: You'll size the coat, not the person, and the jacket will swim once it's worn over a tee.
- Mixing body and garment inches: A 40 inch body chest doesn't mean a 40 inch finished jacket, because the garment needs wearing ease.
- Forgetting the layer underneath: A shell fitted over a tee in August can bind over a hoodie in November.
Fix those three and your exchange pile shrinks fast. You're still ordering for humans, so keep the reserve, but you'll need it for real outliers instead of half the roster.
Pick Decoration That Lasts the Season
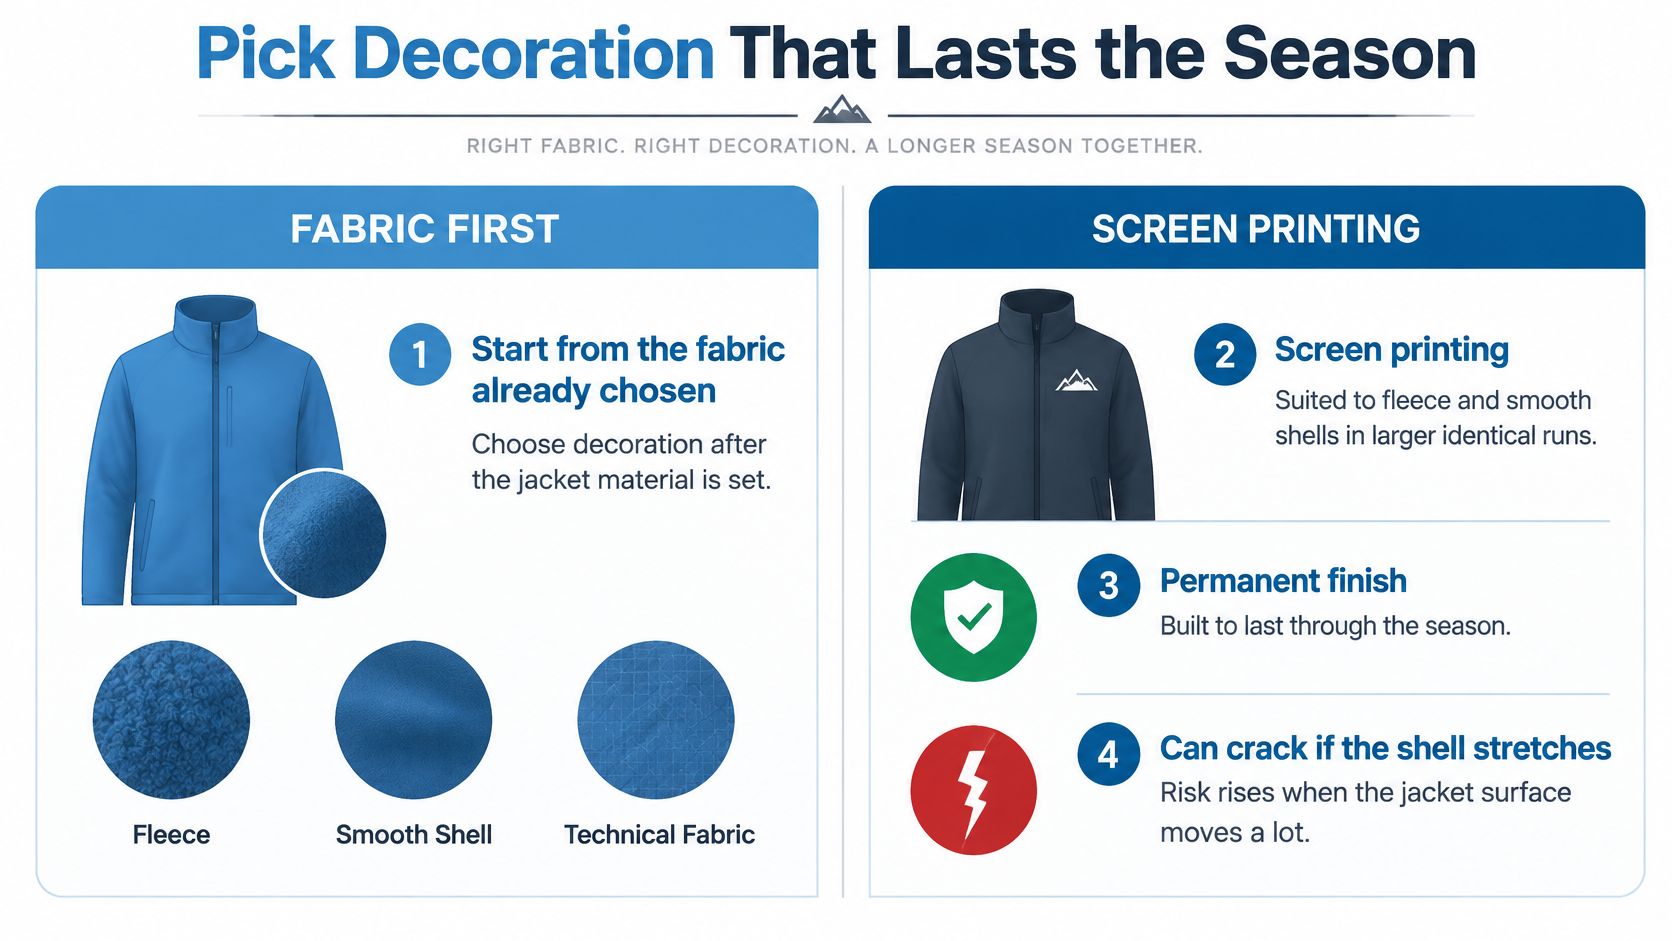
Start from the fabric you already chose, not from the prettiest mockup. A method that sings on fleece can fail on a coated shell, and a mark you can't remove becomes a problem the day a sponsor changes. Fabric first, permanence second, art third.
This comparison keeps the screen printing trade off in view before you compare the rest of the methods.
Match Method to Fabric
Screen printing suits fleece, cotton blends, and smooth shells in larger identical runs. It's permanent and strong on flat fabric, but it can crack if the shell stretches hard across the print. Embroidery is the default for structured outerwear, soft shells, and varsity chests. It lasts for years, though thick coverage feels stiff and unpicking a stitched sponsor logo can scar the panel.
Direct to film, or DTF, handles full color logos on small runs across many fabrics when it's cured properly. Rub test it on coated shells before a full run. Sublimation dyes light polyester performance shells and gives you art that won't peel, but it fails on cotton, leather, and dark nylon.
Patches split into two very different choices. A sew on patch carries letters and mascots for years on varsity and heavy shells, and it's hard to remove once sewn. A hook and loop patch is the roster friendly option when a sponsor or role title will change, because you swap the patch and keep the jacket.
Decoration Methods for Team Jackets
| Method | Works On | Roster or Sponsor Changes | Wash Note |
|---|---|---|---|
| Screen printing | Fleece, cotton blends, smooth shells | Permanent | Strong on flat fabric; can crack on stretch |
| Embroidery | Structured shells, wool, soft shell, varsity | Permanent stitches | Longest life; heavy coverage feels stiff |
| Direct to film | Many fabrics and full color art, including short runs | Permanent film | Cure fully and rub test coated shells |
| Sublimation | White or light polyester | Permanent dye | Not for cotton, leather, or dark nylon |
| Sew on patch | Varsity, wool, heavy shells | Hard to remove once sewn | Very durable |
| Hook and loop patch | Sponsor or role marks on a blank jacket | Swap the patch, keep the jacket | Check the loop stays flat after washing |
One Small Staff, Worked Through
Say you're dressing a 12 person softball staff. Put chest embroidery on the coaches' soft shells, because those jackets are structured and the team mark won't change mid season. Put the sponsor on a removable sleeve patch, because sponsors do change. Keep the players' lightweight shells free of any giant back film, so the fabric still breathes during warmups.
That kind of mixed plan is easier when one shop can run several methods after a proof instead of forcing everything through one machine. Dirt Cheap Product can run screen printing, embroidery, DTF, sublimation, and patches on outerwear, and it doesn't create business cards or fliers, so the method can follow your fabric. Before you approve any of them, ask how the color pair holds up in the wash and review the basics of color fastness testing for decorated apparel with your decorator.
Match one method to each tier now. Names come after that decision, not before it.
Set Names Numbers and Order Quantity
Here's the question teams skip. Should names and numbers go on at the factory, during decoration, or only after the roster is real? For most groups, hold names until the roster locks. Produce team only marks first, then add names in a second pass, unless your wear date is so close that a second pass is impossible.
Three Paths, Three Levels of Risk
Full names and numbers at the factory feel special on day one. They're also the hardest to reuse when someone transfers, quits, or changes numbers, and an unsold named jacket can't go to the next player. Team logo only, with a later name pass costs a second setup, but it saves you from a stack of personalized shells nobody can wear. A blank team jacket plus a detachable identifier, such as a hook and loop name or number, survives mid season moves and sponsor swaps with the least waste.
Personalization has real pull, so this isn't an argument against it. Customized merchandise is identified as a faster growing segment than standard merchandise in North American fan commerce reporting, and customized products could represent about 10% of merchandise sales in 2025, a forecast rather than audited industry wide data, according to the North America direct to consumer sports merchandise platform report from HTF Market Intelligence. A named jacket can lift what a fan will pay. A named jacket that never ships is just waste with nice stitching.
A durable blank reused next season beats a one roster souvenir every time.
The Quantity Rule That Follows
Order the confirmed roster, plus about 5% to 10% unlabeled extras for size swaps. Those extras stay useful because they carry the team mark only, so any new player can wear one. If every jacket carries a name, cut the extras back to one or two unmarked samples instead of a full spare in each size.
Ask two questions before you finalize the count. Can the sponsor mark come off without leaving a hole or a ghost outline? What's the shop's minimum run for each decoration method, since a small named batch can fall below it and jump in unit cost?
Reorders need the same caution. A three piece reorder later may miss the original dye lot and cost more per jacket than the first run. Before you place it, check chest and sleeve colors against the original blank so the new jackets match the ones already on the bench.
Build a Budget and a Wear Date
Work backward from the first wear date, not from the day the logo is ready. Every time and price in this section is a planning estimate to confirm with your decorator, since brand, size, art, and season move both. Use the ranges to build a calendar and a budget you can defend, then let the proof and blank spec turn them into a quote.
Count Backward on the Calendar
Lead Time From Art to First Wear
| Phase | Working Time | Slip That Misses the Date |
|---|---|---|
| Artwork and digital proof | 1 to 3 business days | Low resolution art or late color changes |
| Size samples | 7 to 14 days | Skipping the try on to save a week |
| Standard decoration | 10 to 15 business days after approval | Adding names after the roster freeze |
| Varsity chenille or leather sleeves | 4 to 8 weeks | Personal names sitting in a long queue |
| Shipping in the US | 3 to 7 business days | Split ship tos in peak season |
| Buffer before first wear | 7 days with nothing scheduled | A Friday delivery for a Saturday game |
Read it from the bottom up. The 7 day buffer holds nothing, and that's the point, because it's where a late truck or one bad size gets absorbed. Varsity work with chenille letters or leather sleeves runs on a different clock than standard screen print, embroidery, DTF, or sublimation, so a mixed order ships on the slowest tier unless you split delivery on purpose.
Price the Mix, Not the Headline Jacket
Use planning bands, not a quote, and confirm each one with your decorator. A decorated fleece team jacket often lands around $35 to $70 as a planning estimate. A soft shell or light insulated jacket often lands around $55 to $110, and a classic varsity around $90 to $200 or more, before shipping and samples.
Names and numbers are usually a per piece add. Screen setup or embroidery digitizing is usually charged once per design. Both are planning estimates to confirm, because stitch count, print size, and quantity move them.
Now price your actual mix. A 20 person club buying 12 soft shells and 8 fleece jackets writes a very different check than the same club buying 20 leather sleeve varsities. That's the two tier system doing budget work, not just comfort work. Don't multiply the fanciest jacket by every head and call it a plan.
Approve the Proof and Place the Order
Two checks still save a bad run at this stage, and both take less time than a reprint. Read the proof at print size, checking colors, the spelling of the team name, and whether the chest mark sits clear of the zipper. Then confirm the size sheet is locked and the wear date still has its spare week.
Wash the Real Swatch
If your jacket uses white stitching, a light panel, or a heat graphic on dark fabric, test a production representative swatch before the big run. Don't approve art on a swatch that isn't the actual shell, and check both fading and staining onto the panel next to it. Under AATCC TM61, an accelerated test lasting 45 minutes can simulate color and surface changes comparable to five home or hand launderings, and published apparel guidance commonly identifies Grade 4 for color change and Grade 3 to 4 for staining as practical minimum targets, as summarized in this guide to colorfastness testing for wash, light, rubbing, and perspiration. Your own buyer spec wins over any general target, so write the grade you require on the order.
Freeze names until the roster locks, and test the color pair, not just the base cloth.
Then act. Upload the vector logo, ask for the proof, and order both tiers against the locked sizes. That's the next move, not another round of style debate.
Send your vector logo, your locked size sheet, and your first wear date to Dirt Cheap Product, Inc. and ask for a proof on both tiers of your team jacket order before production starts. You'll get the decoration method matched to each fabric, from embroidery and patches to screen printing, DTF, and sublimation, so players, coaches, and supporters each end up in the jacket that fits their job.