
A customer calls with a familiar request: 50 custom polyester polos, full-color logos, and delivery before an event next week. You need a method that handles detailed artwork, avoids unnecessary setup, and produces repeatable results without tying up your shop for days. That's where sublimation can fit, provided the garment, artwork, equipment, and deadline all match the process.
Learning how to sublimate isn't just about operating a heat press. A profitable workflow depends on choosing the right substrates, controlling production variables, and recognizing when DTF or screen printing will serve the customer better.
Table of Contents
- Understanding Sublimation and Why It Matters for Your Business
- Equipment and Consumables You Actually Need
- The Complete Production Workflow from Artwork to Finished Product
- The Cotton Problem and When to Choose Alternative Methods
- Troubleshooting Common Problems and Quality Control
- Scaling Production and When to Outsource to a Partner
Understanding Sublimation and Why It Matters for Your Business
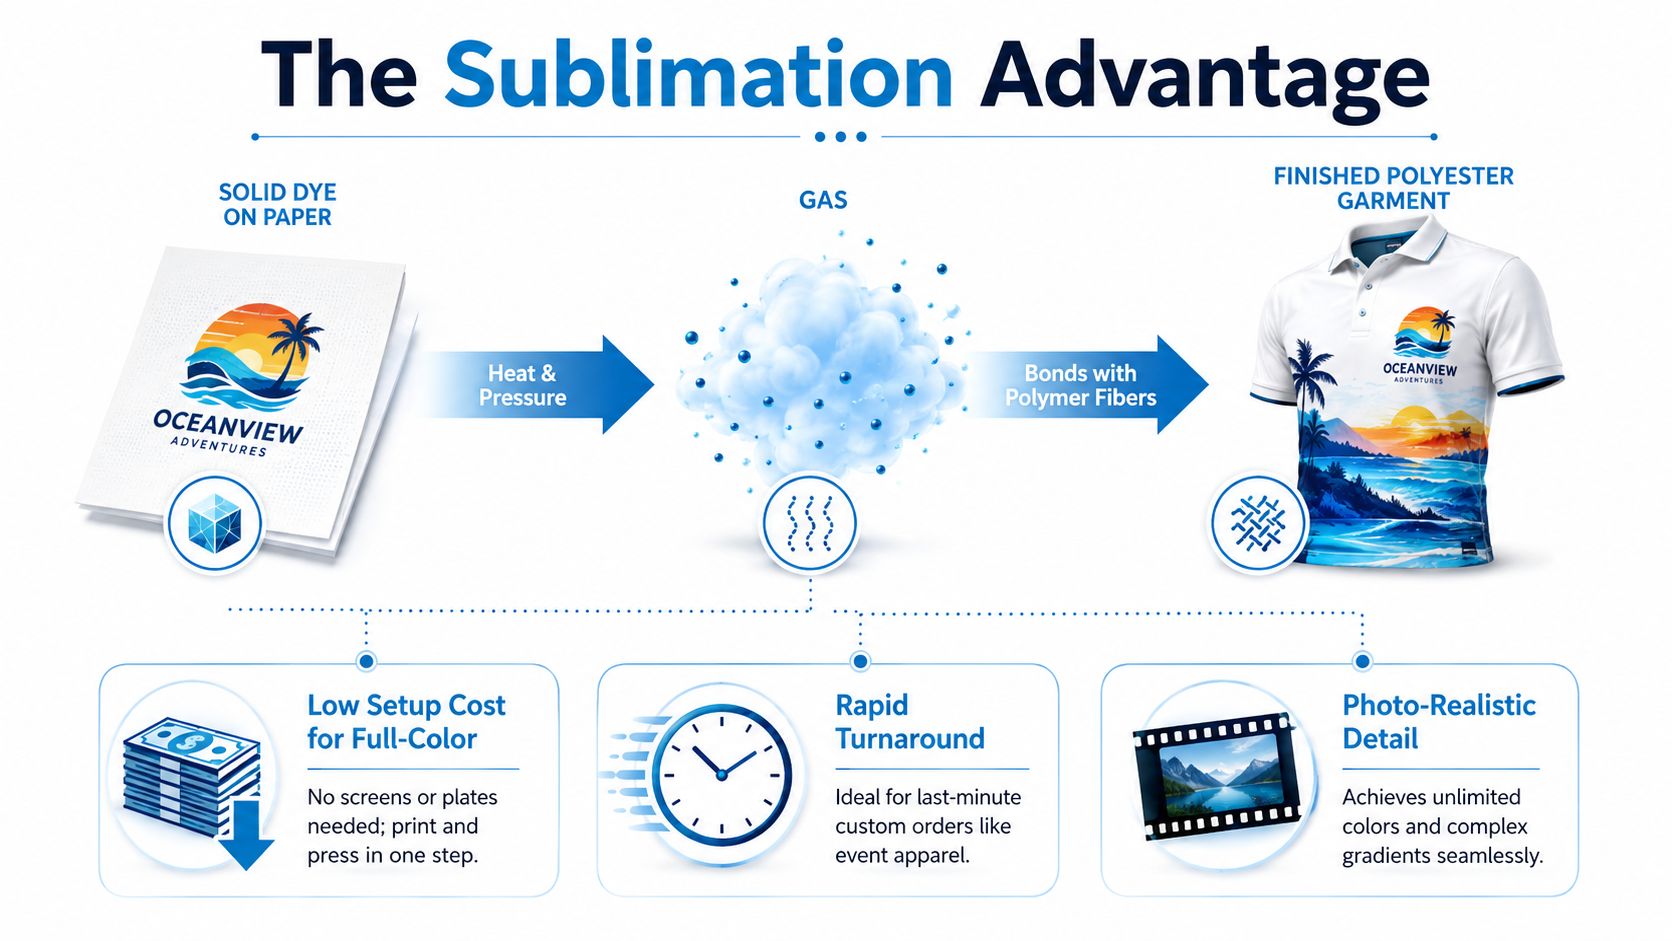
Sublimation printing uses heat to turn solid dye into a gas. Under pressure, that dye bonds with polyester fibers or a polymer-coated surface instead of forming a separate layer on top. The result is a vibrant decoration with no raised ink film, which gives the finished item a soft-hand feel and avoids the cracking or peeling associated with some surface-applied graphics. The technical foundation of the process is described in the Printing Industries of America technical paper on sublimation heat transfer printing.
Commercial sublimation heat transfer printing developed as we know it today in 1956, while French researcher Noël de Plasse observed around 1957 that certain disperse dyes could move from solid to gas under heat and transfer onto fabric. That development helped establish the process behind modern apparel, hard-surface, and promotional-item workflows, as outlined in this history of dye sublimation printing.
Where sublimation earns its place
Sublimation works especially well for:
- Polyester apparel: Jerseys, polos, performance shirts, leggings, and other white or light polyester garments can carry colorful edge-to-edge artwork.
- Coated hard goods: Mugs, tumblers, plaques, keychains, phone accessories, and similar blanks can accept sublimated graphics when their coating is designed for the process. For drinkware ideas, review these branding options for custom mugs.
- Detailed artwork: Photographs, gradients, illustrations, and complex logos can print without screen separations or a limited spot-color palette.
- Short custom runs: You can print and press designs without creating screens, making the process practical for samples, personalized items, and event orders.
The business advantage is flexibility. A single sublimation design can contain unlimited colors, photographic detail, and smooth gradients without adding separate screen setup for each color. That can make a detailed small order easier to manage than screen printing.
The limitation is equally important. Classic sublimation needs a polyester or polymer surface, and it doesn't create white ink. A dark cotton shirt won't become a suitable sublimation blank even if you have a powerful press. If a customer's order is mostly cotton, dark garments, or large quantities of one simple design, another decoration method may protect both your margin and the customer's expectations.
Equipment and Consumables You Actually Need
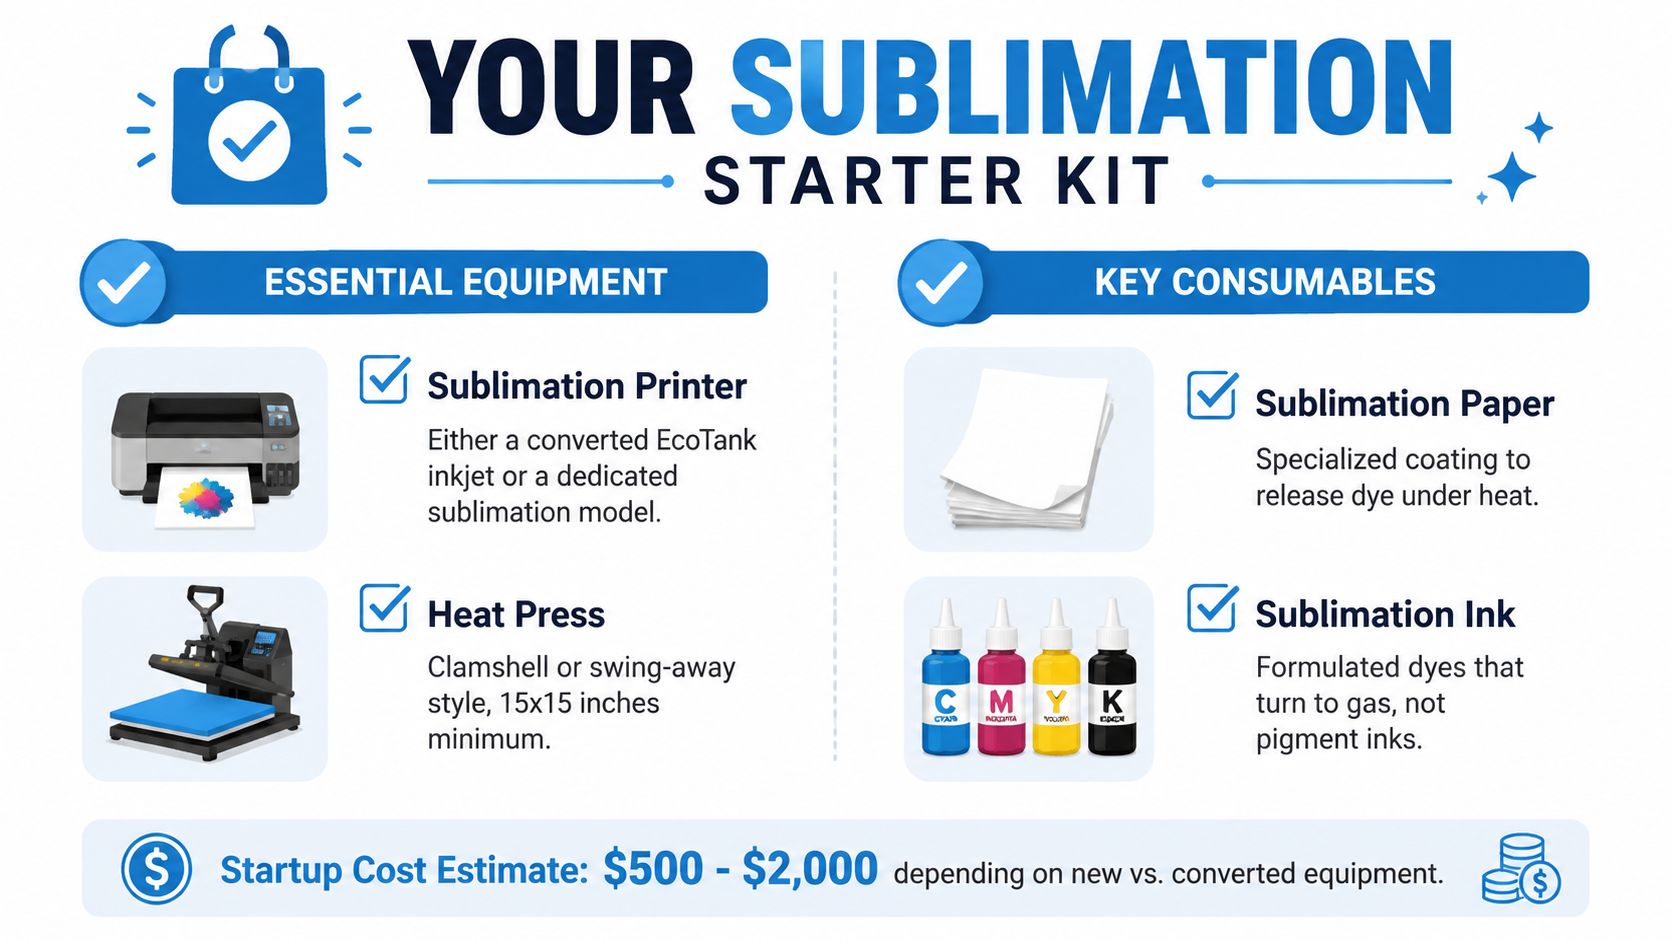
A workable sublimation setup has four core components: a printer, a heat press, transfer paper, and sublimation ink. The right combination depends on whether you're producing occasional personalized pieces or building a repeatable apparel service.
Prioritize the press before expanding capacity
A converted EcoTank-style inkjet can lower the entry barrier, but conversion requires discipline. Use a new printer for sublimation rather than one that has already held ordinary ink, and don't mix regular ink with sublimation ink. A dedicated sublimation printer usually offers a more controlled production path, manufacturer support, and a design suited to sublimation chemistry, while a converted unit may be attractive for testing demand.
The heat press deserves serious attention because inconsistent pressure or temperature creates more waste than a modest printer ever will. A clamshell press is compact and straightforward for flat apparel. A swing-away press gives more room for positioning and can reduce the chance of touching a hot platen while arranging the garment. For apparel, a flat platen around 15 by 15 inches is a practical minimum for many designs, while larger artwork may require a wider format.
Choose attachments around the products you sell.
- Flat platen: T-shirts, polos, jerseys, tote bags, and flat polyester panels.
- Mug press: Cylindrical drinkware and compatible coated blanks.
- Cap press: Structured hats and other curved headwear blanks.
Don't buy every attachment at launch. If your first orders are event polos, spend on a reliable flat press, accurate temperature control, and quality consumables. If you plan to test foil or layered heat-transfer applications alongside sublimation, a curated B-Sew Inn foil selection can help you compare techniques without treating every job as a sublimation job.
Build a job-level cost model
Track paper, ink, blank garments, protective sheets, labor, failed pieces, packaging, and shipping. Your break-even point isn't determined by printer price alone. A low-cost setup can become expensive if it produces uneven color, requires repeated pressing, or can't handle the physical size of your artwork.
Keep a simple production sheet for every order. Record the blank, transfer size, press recipe, labor time, and rework. The heat press temperature guide can support recipe development, but your own test results on the exact blank should control final production.
The Complete Production Workflow from Artwork to Finished Product
The most reliable way to sublimate is to treat every order as a controlled chain. Artwork errors, moisture, movement, and unsuitable blanks can all create failures before the press cycle ends.
Prepare the artwork
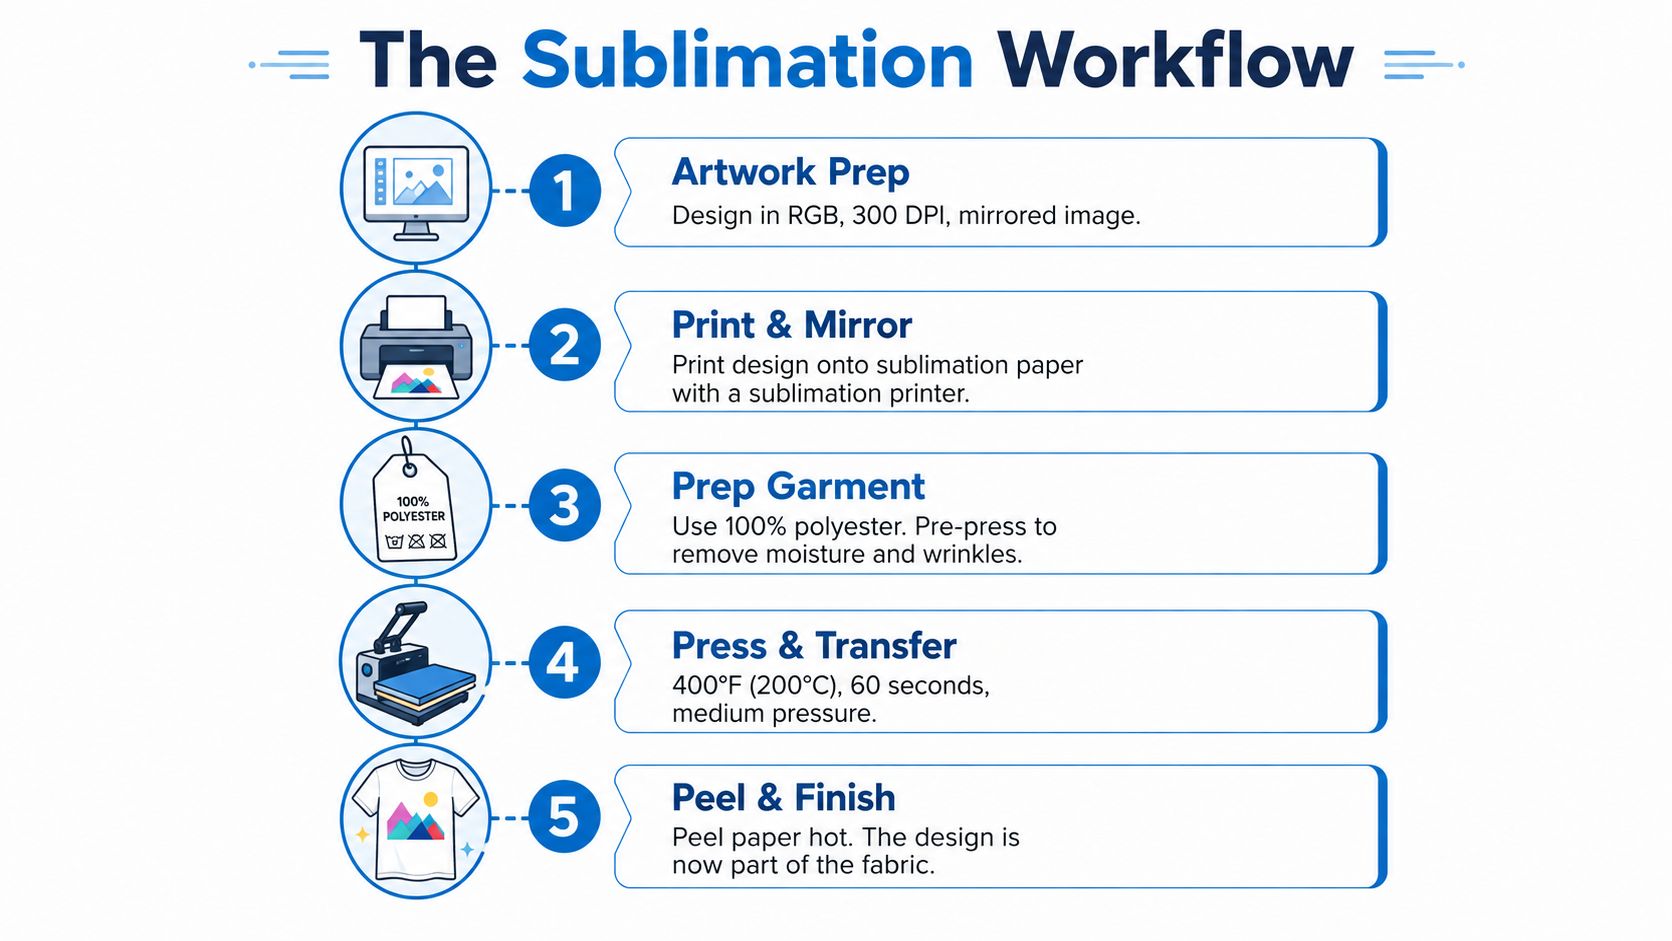
Start with clean vector artwork when possible. Logos supplied as vector files remain easier to resize, while raster artwork should have enough resolution for the final print size. Work in RGB when your printer's color-management workflow expects RGB input, and keep a consistent profile from design software through the printer driver.
Mirror the artwork before printing. Text, numbers, and directional logos will appear backward after transfer if you skip this step. Save a mirrored production copy so the approved design remains available for reference.
Set the printer to the correct sublimation paper type and use the ink-density or quality setting appropriate for the paper and substrate. Too little ink can produce weak color, while excessive ink may create moisture, drying, or transfer problems. Let freshly printed paper stabilize before handling it, and store unused paper flat in a dry environment. Humidity can affect feeding, curl, and transfer consistency.
Press with a repeatable recipe
Pre-press the garment briefly to remove moisture and flatten wrinkles. Place protective paper inside the garment when needed, position the transfer face down, and secure it with heat-resistant tape. Tape matters because even a small movement while opening the press can cause ghosting or a blurred edge.
For polyester fabric, commonly recommended settings are 385 to 400°F for 45 to 60 seconds with medium pressure, while white and light polyester garments commonly use 385 to 395°F. Follow the recommended polyester heat-press settings as a starting point, then test the exact blank and press combination.
The infographic recipe of 400°F for 60 seconds can work as a starting production test, but don't treat it as universal. Fabric weight, coating, press accuracy, and blank construction all affect the result. Follow the supplier's instructions when they differ, and document the result that passes inspection.
A practical example of a non-apparel product is customizable flip flops for merch, where blank construction and curved surfaces make positioning and testing especially important.
Finish without shifting the image
Peel according to the substrate and paper instructions. Some materials perform best with an immediate hot peel, while others need to cool before separation. Never slide the paper across the surface after pressing, because that can smear edges or create a second image.
Use the dye sublimation process guide as a reference for the overall sequence, then validate the recipe with a test blank before committing to a customer batch.
The Cotton Problem and When to Choose Alternative Methods
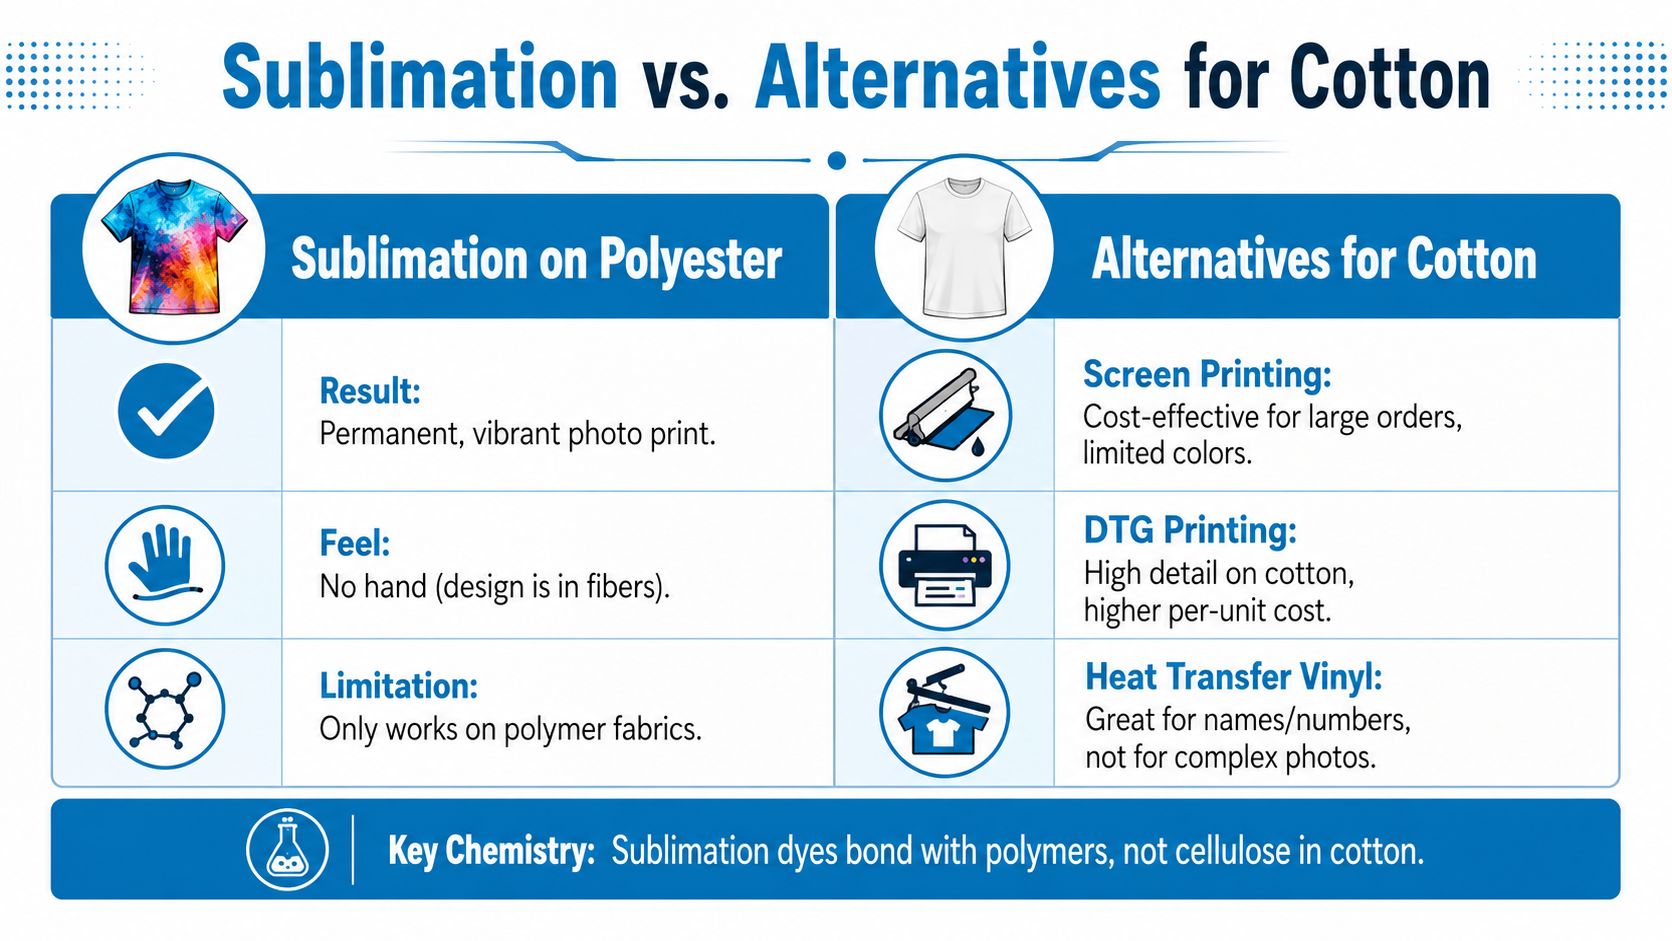
Classic sublimation doesn't bond to cotton because the dye is designed to attach to polymer fibers. Cotton is cellulose, not polyester, so the color has no comparable polymer structure to enter and lock into. The result may look acceptable briefly under some experimental conditions, but it won't deliver the dependable saturation and durability expected from a production garment.
Polyester still dominates sublimation substrate share, while cotton remains incompatible with classic dye sublimation. Blended fabrics can produce muted or inconsistent results, a limitation documented in coverage of the dye sublimation printing market.
Match the method to the order
Use this decision framework before quoting:
| Customer requirement | More suitable direction |
|---|---|
| White or light polyester, detailed full-color artwork | Sublimation |
| Cotton garment with photographic artwork | DTF or DTG |
| Large order with a simple design and repeat colors | Screen printing |
| Names, numbers, or simple lettering | Heat transfer vinyl |
| Dark garment requiring white underbase | DTF, screen printing, or another opaque method |
DTF gives you more freedom across cotton, blends, polyester, and darker garments, although the decoration sits on the fabric rather than becoming part of the fiber. Screen printing can be economical for larger repeat orders, especially when the design uses a controlled number of colors. Heat transfer vinyl works well for names and numbers, but it isn't the natural choice for complex photographs or detailed gradients.
New ink technologies and hybrid systems are attempting to extend sublimation toward cotton and other difficult substrates. Treat those products as specialized workflows, not proof that every cotton order now works like polyester. They may require specific coatings, compatible equipment, additional testing, and a different cost model.
Explain the limitation before quoting. Say, “Your artwork is suitable for sublimation, but the cotton shirt you selected isn't. We can keep that garment and use DTF, or move to a polyester option and preserve the soft dye-in-fiber result.” That keeps the sale focused on the customer's outcome rather than on defending a process.
Troubleshooting Common Problems and Quality Control
Most sublimation failures have a visible cause. The fastest fix is to inspect the transfer, garment, press, and artwork as separate parts instead of changing several variables at once.
Diagnose the defect first
- Ghosting or blur: The paper moved during opening or peeling. Secure it with heat-resistant tape, keep the garment stable, and lift the paper cleanly.
- Faded or shifted color: Check the paper setting, color profile, ink density, and blank coating. Compare the failed piece with the approved digital proof, but remember that the paper itself can look dull before pressing.
- Uneven coverage: Inspect the platen for wear, confirm that the garment lies flat, and check whether the press closes evenly across the design.
- Scorching or unwanted color change: Excessive heat or dwell time may be damaging the fabric. Test a lower point within the supplier's approved range instead of changing pressure and temperature together.
- White marks or inconsistent areas: Moisture, wrinkles, seams, or uneven fabric tension may be interrupting contact. Pre-press the garment and use a smooth protective setup.
Sublimation inks release dye vapor as they change from solid to gas at temperatures typically between 380°F and 420°F, which is why ventilation and temperature guidance for sublimation production matters. Use room airflow and suitable local exhaust, especially when production runs involve repeated heat cycles.
Add inspection gates
Inspect the blank before printing, approve a transfer before pressing the full order, and check the first finished item for placement, saturation, edge clarity, and surface damage. Keep one approved sample beside the production station so operators aren't relying on memory.
Production rule: Change one variable at a time. If you alter temperature, pressure, paper, and dwell simultaneously, you won't know which change solved or caused the problem.
Record rejected pieces and their causes. Over time, that log becomes more useful than generic settings charts because it reflects your press, your blanks, and your artwork pipeline.
Scaling Production and When to Outsource to a Partner
Keep sublimation in-house when you need fast samples, personalized pieces, or short-turn orders that would lose time in transit. Direct control helps with artwork changes, press testing, and final inspection. The trade-off is capacity. Printing, loading, pressing, trimming, and checking each unit consume labor, while the printer and heat press can become bottlenecks.
Outsourcing makes more sense when a large order would occupy your press for too long, the job needs equipment you do not own, or your team has higher-value work to complete. Compare the full internal cost with the partner's delivered price. Include labor, failed blanks, machine downtime, packing, and rush shipping, rather than judging the decision by quantity alone.
Use this screening guide:
- Keep in-house: Small personalized orders, urgent samples, repeat jobs with a proven recipe, and products your current press handles comfortably.
- Compare both options: Orders with tight deadlines, multiple garment styles, complex placement, or a customer who may reorder.
- Outsource: Batches beyond your practical press capacity, jobs requiring wide-format equipment, or work that would require buying machinery before demand is established.
Before choosing a production partner, ask how proofs, color expectations, substrate testing, reprints, and deadline updates are handled. Request a physical sample for an unfamiliar blank, confirm who approves the artwork, and check that the quoted price covers the services your order requires.
A hybrid workflow can protect cash flow. Produce fast-turn test pieces and small branded orders internally, then send larger or technically demanding jobs to a partner with suitable capacity. Dirt Cheap Product, Inc. provides custom decoration services such as sublimation, DTF, screen printing, embroidery, and promotional products. That range lets you compare the decoration method with the garment, substrate, artwork, and order requirements instead of forcing every project through sublimation.